Getting Started
What Are the Prerequisites for Using Workload Intelligence?
Workload Intelligence connects to a Snowflake account with minimal setup. The only prerequisite is a Snowflake account with appropriate permissions.
Snowflake Account
Setting up Workload Intelligence requires a Snowflake account with the ACCOUNTADMIN role to run the onboarding scripts. These scripts grant Workload Intelligence limited access to Snowflake resource usage and storage metadata. More information on required permissions is available in the "Understanding the Permissions Model" section below.
What Is the Onboarding Process?
Onboarding involves accessing the Workload Intelligence portal and connecting it to one or more Snowflake accounts. The following sections describe this process and the Snowflake permission model.
Accessing the Portal
Contact sales to activate Workload Intelligence for the organization and register the first user.
Once signup is approved, the first user receives a link to set up an organization profile. The first user to sign up becomes an Administrator with full access to Workload Intelligence.
After completing these steps, a Snowflake account can be added.
How Is a Snowflake Account Connected?
Workload Intelligence requires limited access to a Snowflake account to query usage history metadata. Connecting involves three steps:
- Provide connection information — Workload Intelligence requires a user and role with access to Snowflake resource usage and storage metadata.
- Create schema and views — Workload Intelligence uses a schema with views to query metadata. The onboarding process auto-generates SQL to create this schema and views in the Snowflake account.
What Permissions Does Workload Intelligence Require?
Workload Intelligence accesses usage history data to generate insights and recommendations. For in-depth information on these permissions and metadata, see KWI security setup.
Limited Access to Usage History Metadata
Workload Intelligence requires access to metadata fields related to warehouse, user access, table, and query history data. This data supports finding optimization opportunities and providing observability. Workload Intelligence uses this information to create tables, dashboards, and recommendations.
Network Access
Workload Intelligence provides an allowed IP list for the Workload Intelligence user. These IP addresses are used to access the Snowflake account. If the organization uses an external firewall with Snowflake, it may need to be configured to allow access to these IP addresses.
How Are Required Snowflake Objects Set Up?
On first login, an "Add Account" button appears. Clicking it opens the settings page, which walks through connecting the first Snowflake account. A Snowflake user with ACCOUNTADMIN privileges must perform these steps.
Step 1: User and Role Creation
The first step creates the user and role Workload Intelligence uses to connect to the Snowflake account.
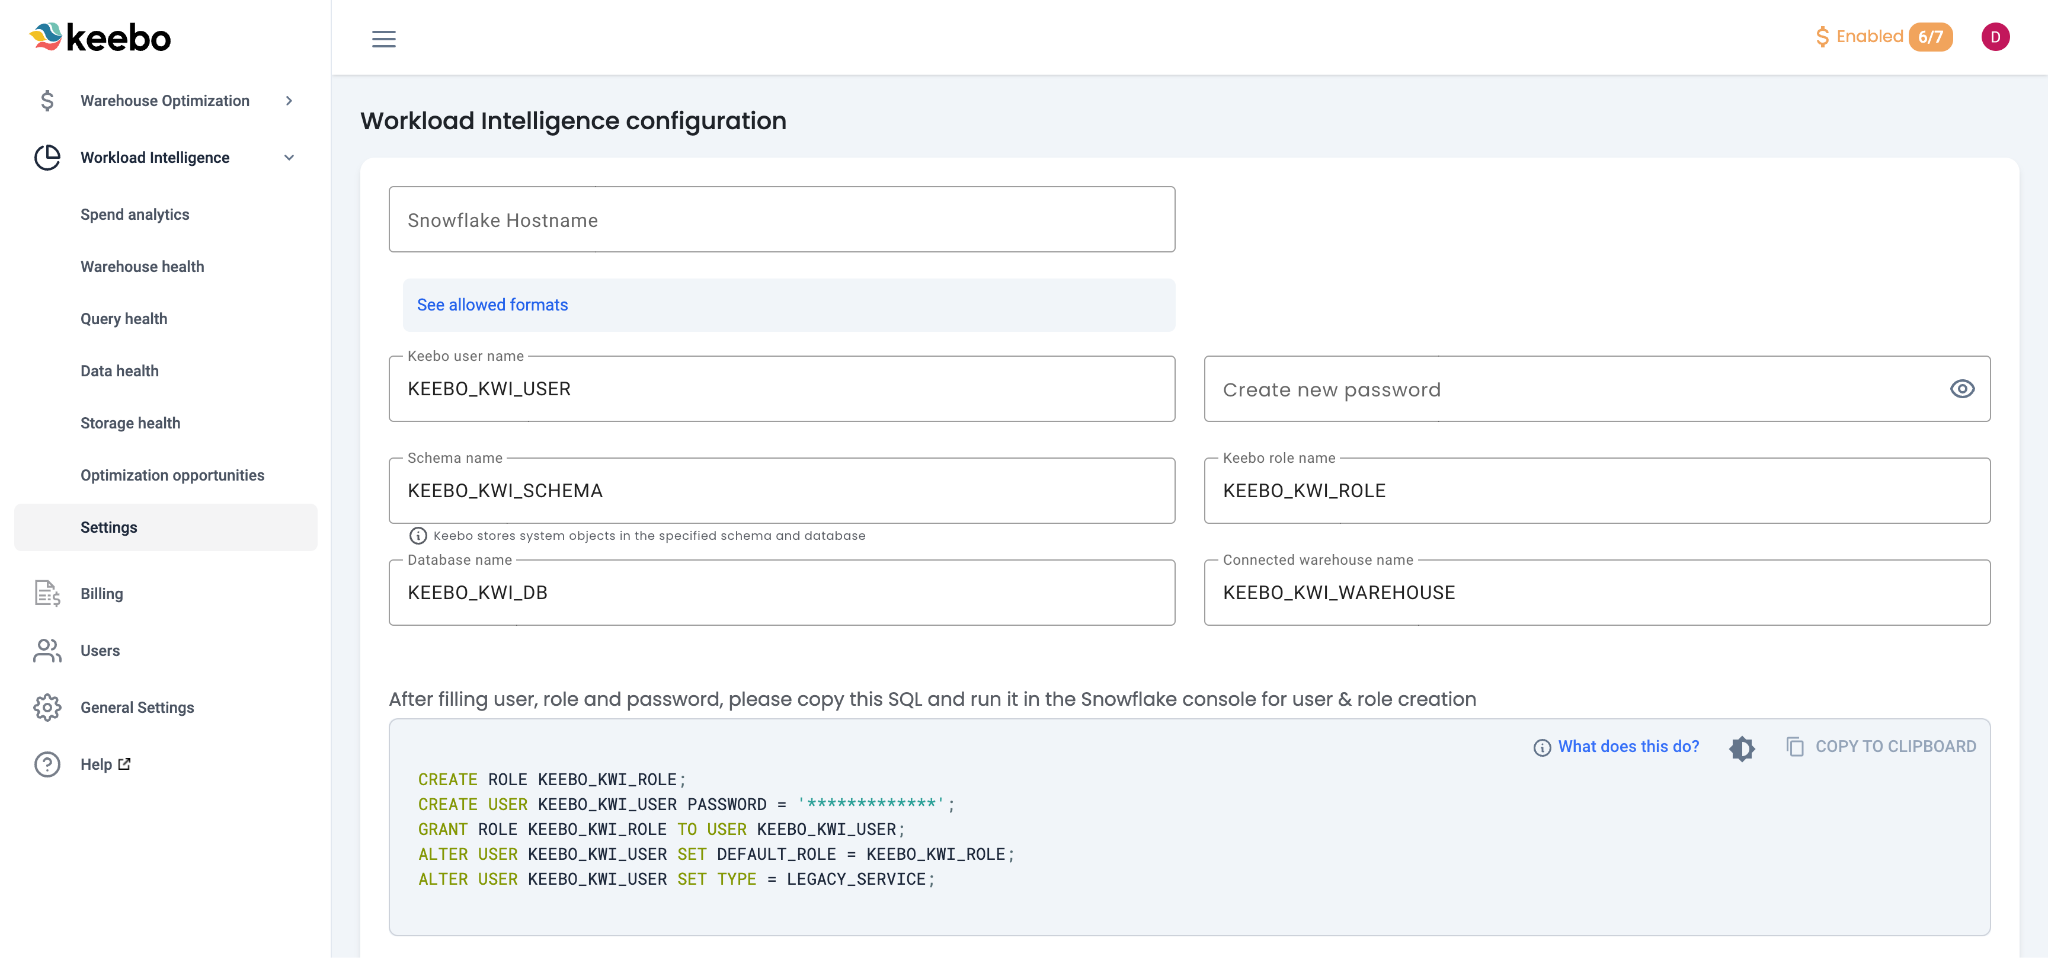
Snowflake Hostname
Add the account's Snowflake Hostname to the "user and role creation" form. The hostname can be found in Snowflake Snowsight and follows one of these formats:
- Organization name: myorg.snowflakecomputing.com
- Account name: myorg-myaccount.snowflakecomputing.com
- Connection name: myorg-connectionname.snowflakecomputing.com
- Account locator (legacy): accountlocator.region.cloud.snowflakecomputing.com
Do not include "https://". Ensure there is no trailing "/" at the end of the hostname. More information is available in the Snowflake documentation.
Keebo User Authentication
Set up the Keebo user with either basic authentication or key pair authentication.
Keebo user name — Defaults to KEEBO_KWI_USER but can be customized.
Role name — Defaults to KEEBO_KWI_ROLE but can be customized.
Basic Authentication — Add a password that Workload Intelligence uses to access the account. Store this password in a secure location.
Key Pair Authentication — Create a private key and password and add them to the appropriate fields.
- Private key password: Set during private key generation.
- Private key: Saved in a file named
rsa_key.p8. Allowed format:-----BEGIN ENCRYPTED PRIVATE KEY----- MIIE6T... -----END ENCRYPTED PRIVATE KEY-----
- RSA public key: Saved in a file named
rsa_key.pub. Format:-----BEGIN PUBLIC KEY----- ... -----END PUBLIC KEY-----
- For more information, see Snowflake's documentation on Configuring key-pair authentication.
Important: Notify Keebo if the password or private key changes. Workload Intelligence would lose access and be unable to continue querying metadata, which could lead to gaps in observability data.
User and Role Creation SQL
After filling out the form, SQL is generated to create the user and role. Copy this SQL and run it in the Snowflake Console. Add the password or RSA public key to the SQL code before running it.
Step 2: View, Schema, and Database Creation
The second step creates the views Workload Intelligence uses to query usage history metadata. Copy the generated SQL and run it in the Snowflake console.
Script Overview
- QUERY_HISTORY — Includes information from
SNOWFLAKE.ACCOUNT_USAGE.QUERY_HISTORY. Provides query observability and recommendations on costly and wasteful queries. - WAREHOUSE_METERING_HISTORY — Includes information from
SNOWFLAKE.ACCOUNT_USAGE.WAREHOUSE_METERING_HISTORY. Provides warehouse observability. - WAREHOUSE_EVENTS_HISTORY — Includes information from
SNOWFLAKE.ACCOUNT_USAGE.WAREHOUSE_EVENTS_HISTORY. Identifies heavily used and imbalanced warehouses. - STORAGE_METRICS — Includes information from
SNOWFLAKE.INFORMATION_SCHEMA.TABLE_STORAGE_METRICS. Identifies opportunities to optimize and save on storage costs. - TABLES — Includes information from
KEEBO_KWI_DB.KEEBO_KWI_SCHEMA.TABLES. Identifies unread or unused tables. - ACCESS_HISTORY — Includes information from
SNOWFLAKE.ACCOUNT_USAGE.ACCESS_HISTORY. Provides observability into which users make the most queries and use the most credits.
Step 3: Warehouse Creation
The form generates SQL to create a warehouse called KEEBO_KWI_WAREHOUSE. Workload Intelligence uses this warehouse to query the views described above. Copy and run this SQL in the Snowflake console.
Step 4: Resource Monitor
The form generates SQL to add a Snowflake resource monitor to the warehouse. The resource monitor provides control over how many credits Workload Intelligence can spend and prevents unwanted cost spikes.
Step 5: IP Allowlisting
The form generates SQL to allowlist the IP addresses Workload Intelligence uses to access the account. Copy and run this SQL in the Snowflake console. If the organization uses a firewall that interacts with Snowflake, configure it to allow access to these IP addresses as well.