Configuring Keebo Warehouse Optimization for Databricks
Warehouse Optimization for Databricks is currently in preview. Reach out to Keebo support for access and onboarding.
Connecting Warehouse Optimization to Databricks is a two-phase process. Phase 1 must be completed by a Databricks admin before Phase 2 can begin in the Keebo portal.
Phase 1 — Databricks Environment Configuration
This phase must be completed by a Databricks admin before starting onboarding in the Keebo portal. The admin must have Account Admin and Metastore Admin permissions on the workspaces being connected.
As you complete Phase 1, use the Values Reference table below to record the credentials and resource identifiers you will need in Phase 2.
Values Reference
Collect these values during Phase 1 and keep them available for the Keebo onboarding wizard in Phase 2.
| Group | Field | Description | Example |
|---|---|---|---|
| Account | Account ID | From the Databricks Account Console URL, after account_id= | ab45cdef-123a-4b5c-67de-89012ab345c6 |
| Service Principal | Client ID | Displayed on the service principal detail page in the Account Console | 18d2ad6f-80e7-4662-9313-22bd73f783a2 |
| Service Principal | Client Secret | Generated when clicking Generate Secret — copy immediately, cannot be viewed again | dose2cdb6ac847e9643d6d63225a7a92159e |
| Workspace(s) | Workspace URL (one per workspace) | Address bar URL when logged into the Databricks workspace | https://xyz.cloud.databricks.com |
| Warehouse(s) | Warehouse ID (one per warehouse) | Displayed next to the warehouse name in SQL Warehouses | abc1234567890ef |
| Catalog / Volume | Catalog name | Unity Catalog catalog that holds the Keebo schema, views, and export volume (default keebo; may be an existing catalog) | keebo (default) |
| Catalog / Volume | Export volume path | Managed volume for usage export (<catalog>.<schema>.export; defaults to keebo.kwo.export) | keebo.kwo.export |
How Is the Keebo Service Principal Created?
Keebo uses OAuth M2M authentication to integrate with Databricks workspaces. Follow these steps to set up an OAuth2 service principal in the Databricks Account Console.
These instructions assume a single Keebo service principal is used to authenticate with all Databricks workspaces. Contact Keebo support for assistance with multiple service principals per account.
-
Log in to the Databricks Account Console:
- AWS: https://accounts.cloud.databricks.com
- Azure: https://accounts.azuredatabricks.net
- GCP: https://accounts.gcp.databricks.com
You can also navigate to the Databricks Account Console from the Databricks Workspace UI
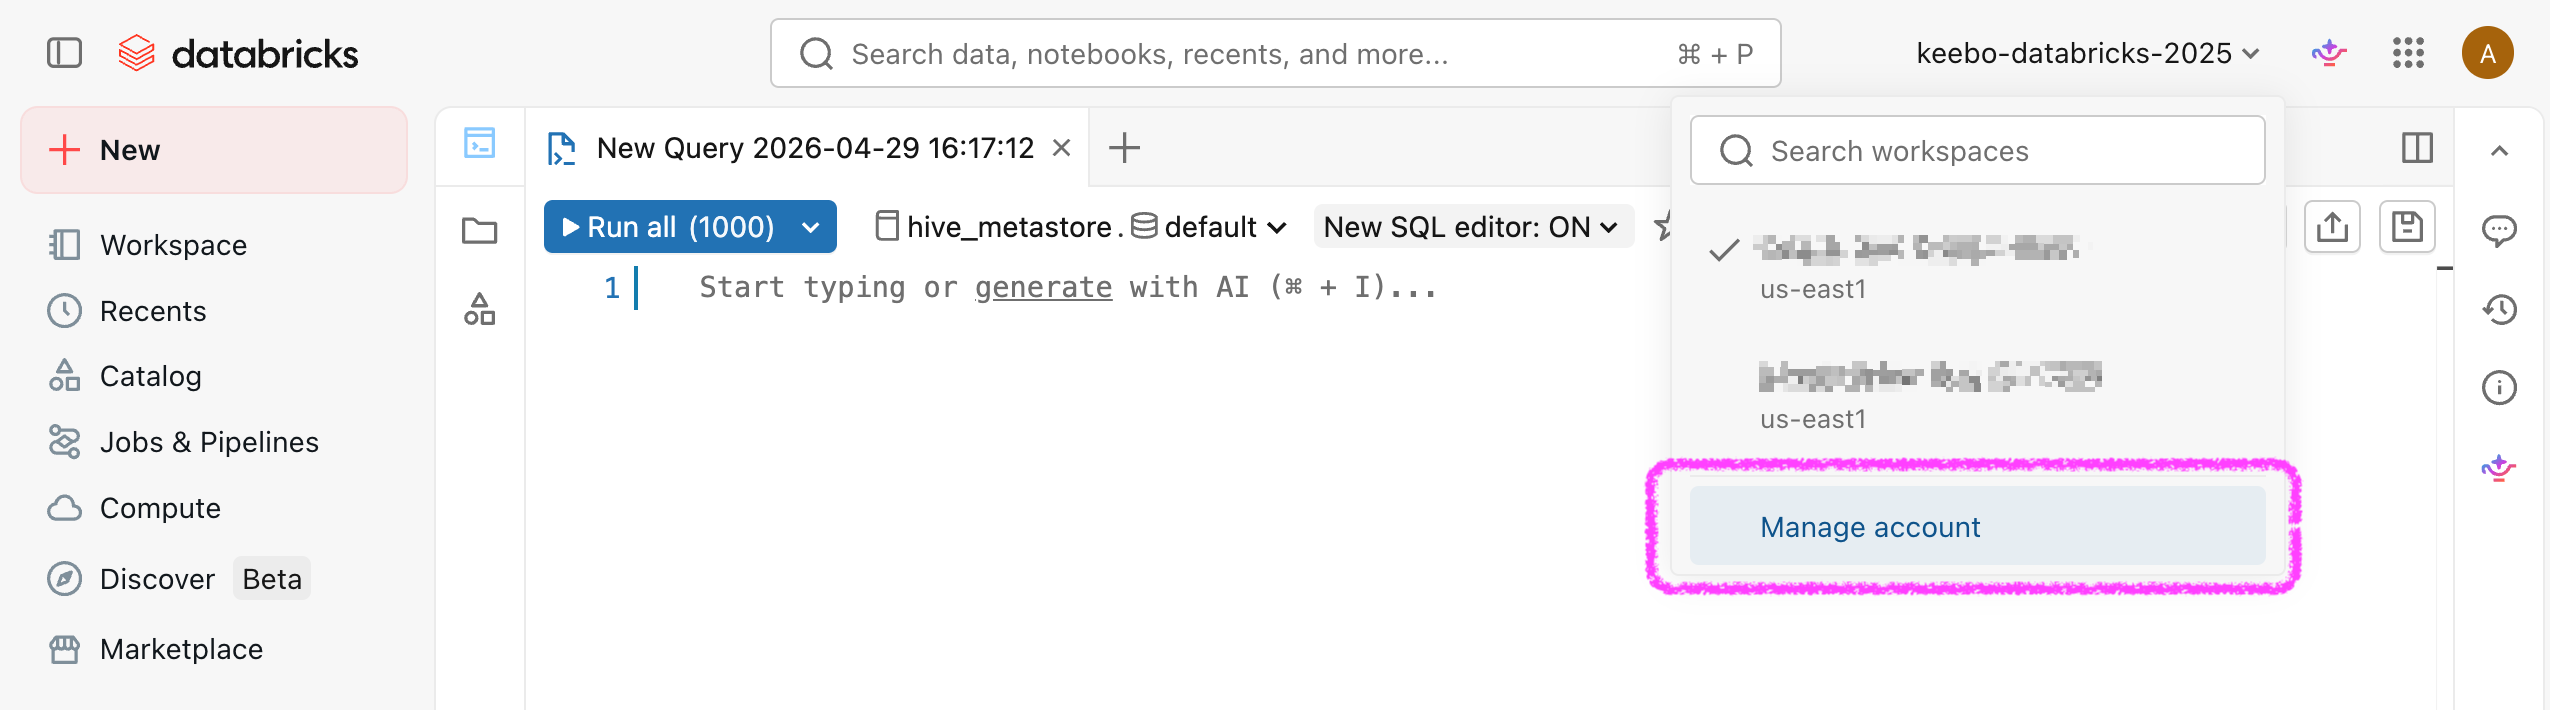
Note the Account ID from the URL (the value after
account_id=) and save it to the Values Reference table. -
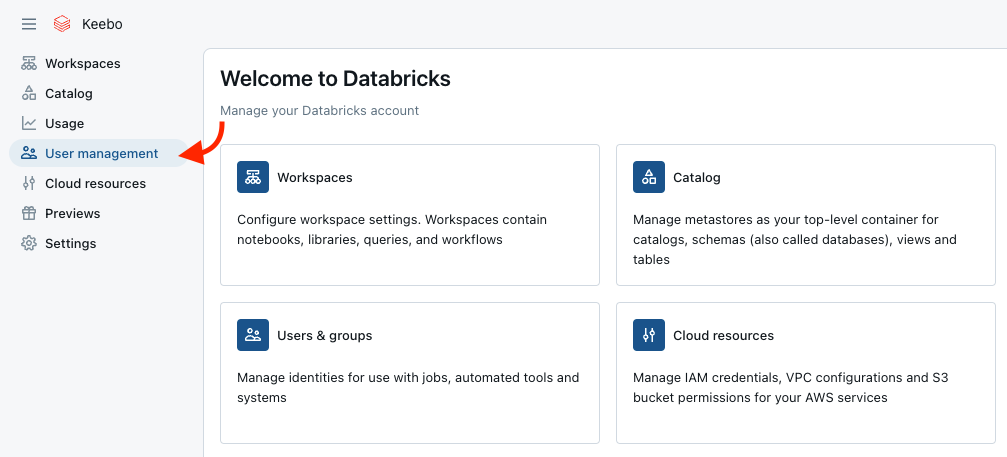
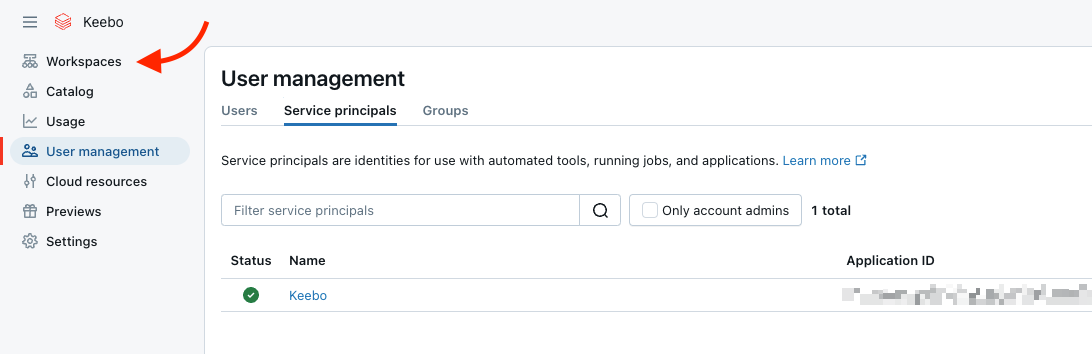
In the left navigation, select User Management.
-
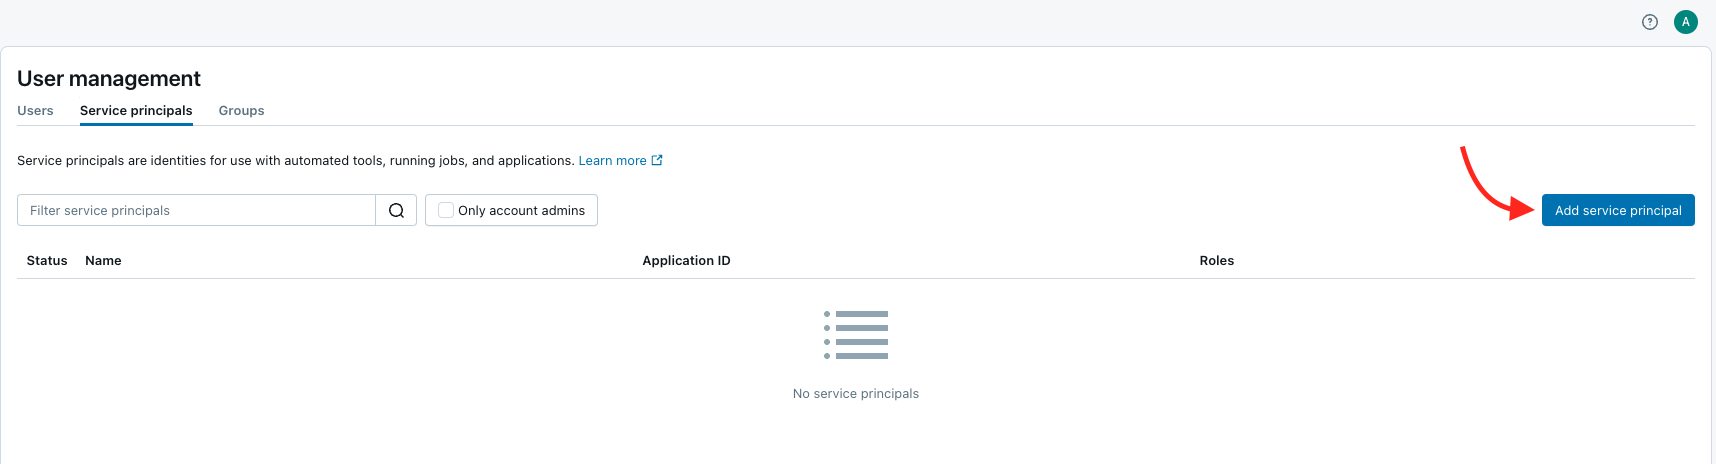
Open the Service Principals tab and click Add service principal.
-
(Azure only) Select "Databricks managed" under the "Management" section.
-
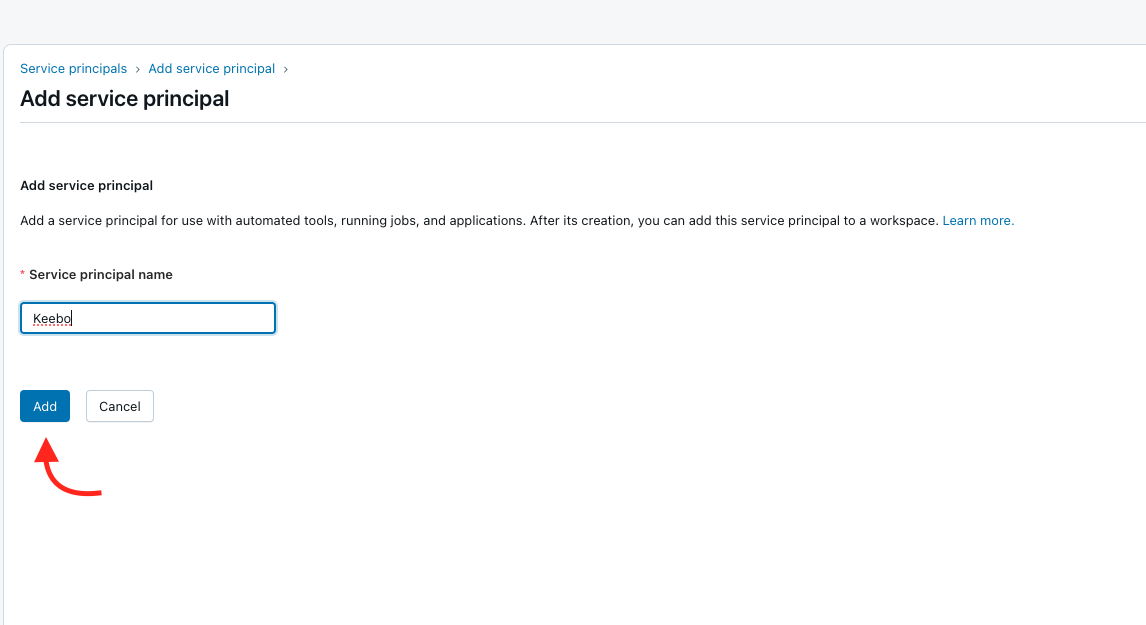
Enter a name for the service principal (recommended: "Keebo") and click Add.
-
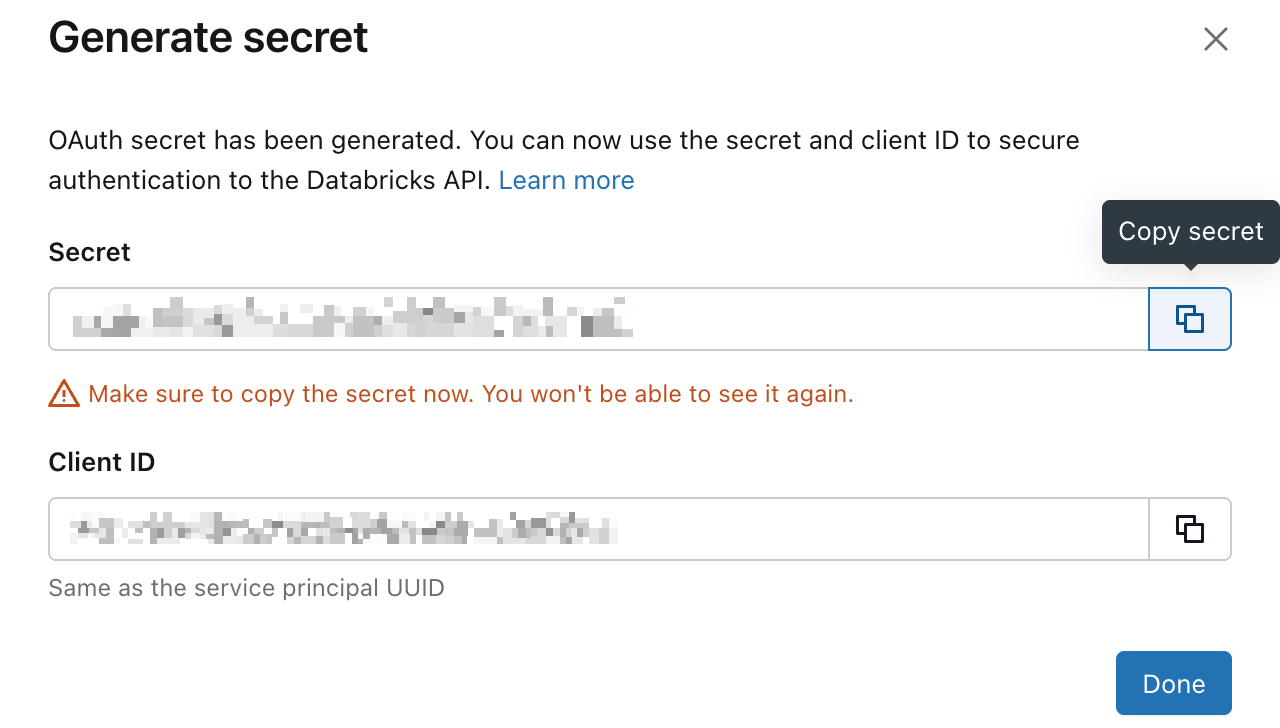
Select the newly created service principal and click Generate Secret.
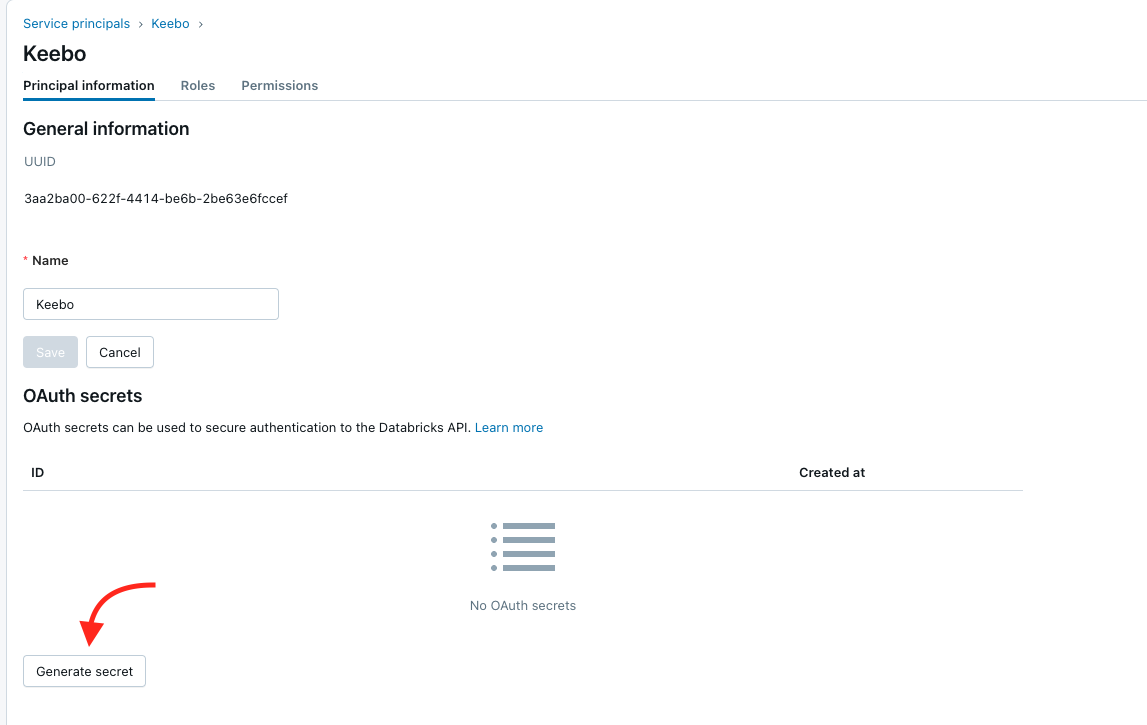
-
Copy the Client ID and Secret from the pop-up and store them in the Values Reference table. The Secret cannot be viewed again after this step.
How Are Workspace Permissions Assigned?
The service principal needs access to every workspace being connected with Keebo. Repeat these steps for each workspace.
-
In the Account Console, click Workspaces in the sidebar.
-
Click the name of the workspace to connect.
-
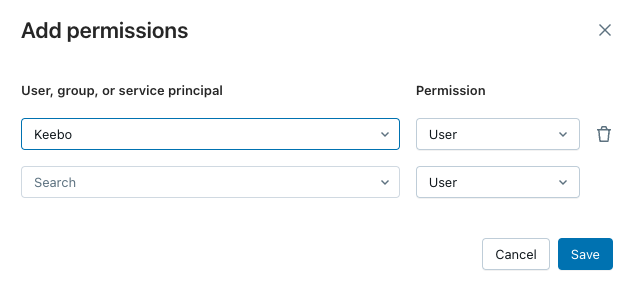
Open the Permissions tab and click Add permissions.

-
Search for and select the Keebo service principal, set the permission level to User, and click Save.
Save the workspace URL (the address bar URL for this workspace) to the Values Reference table.
Do not run GRANT ... ON CATALOG system for the Keebo service principal. Keebo uses a views-based approach instead; see How Is Keebo Granted Access to Usage Data?.
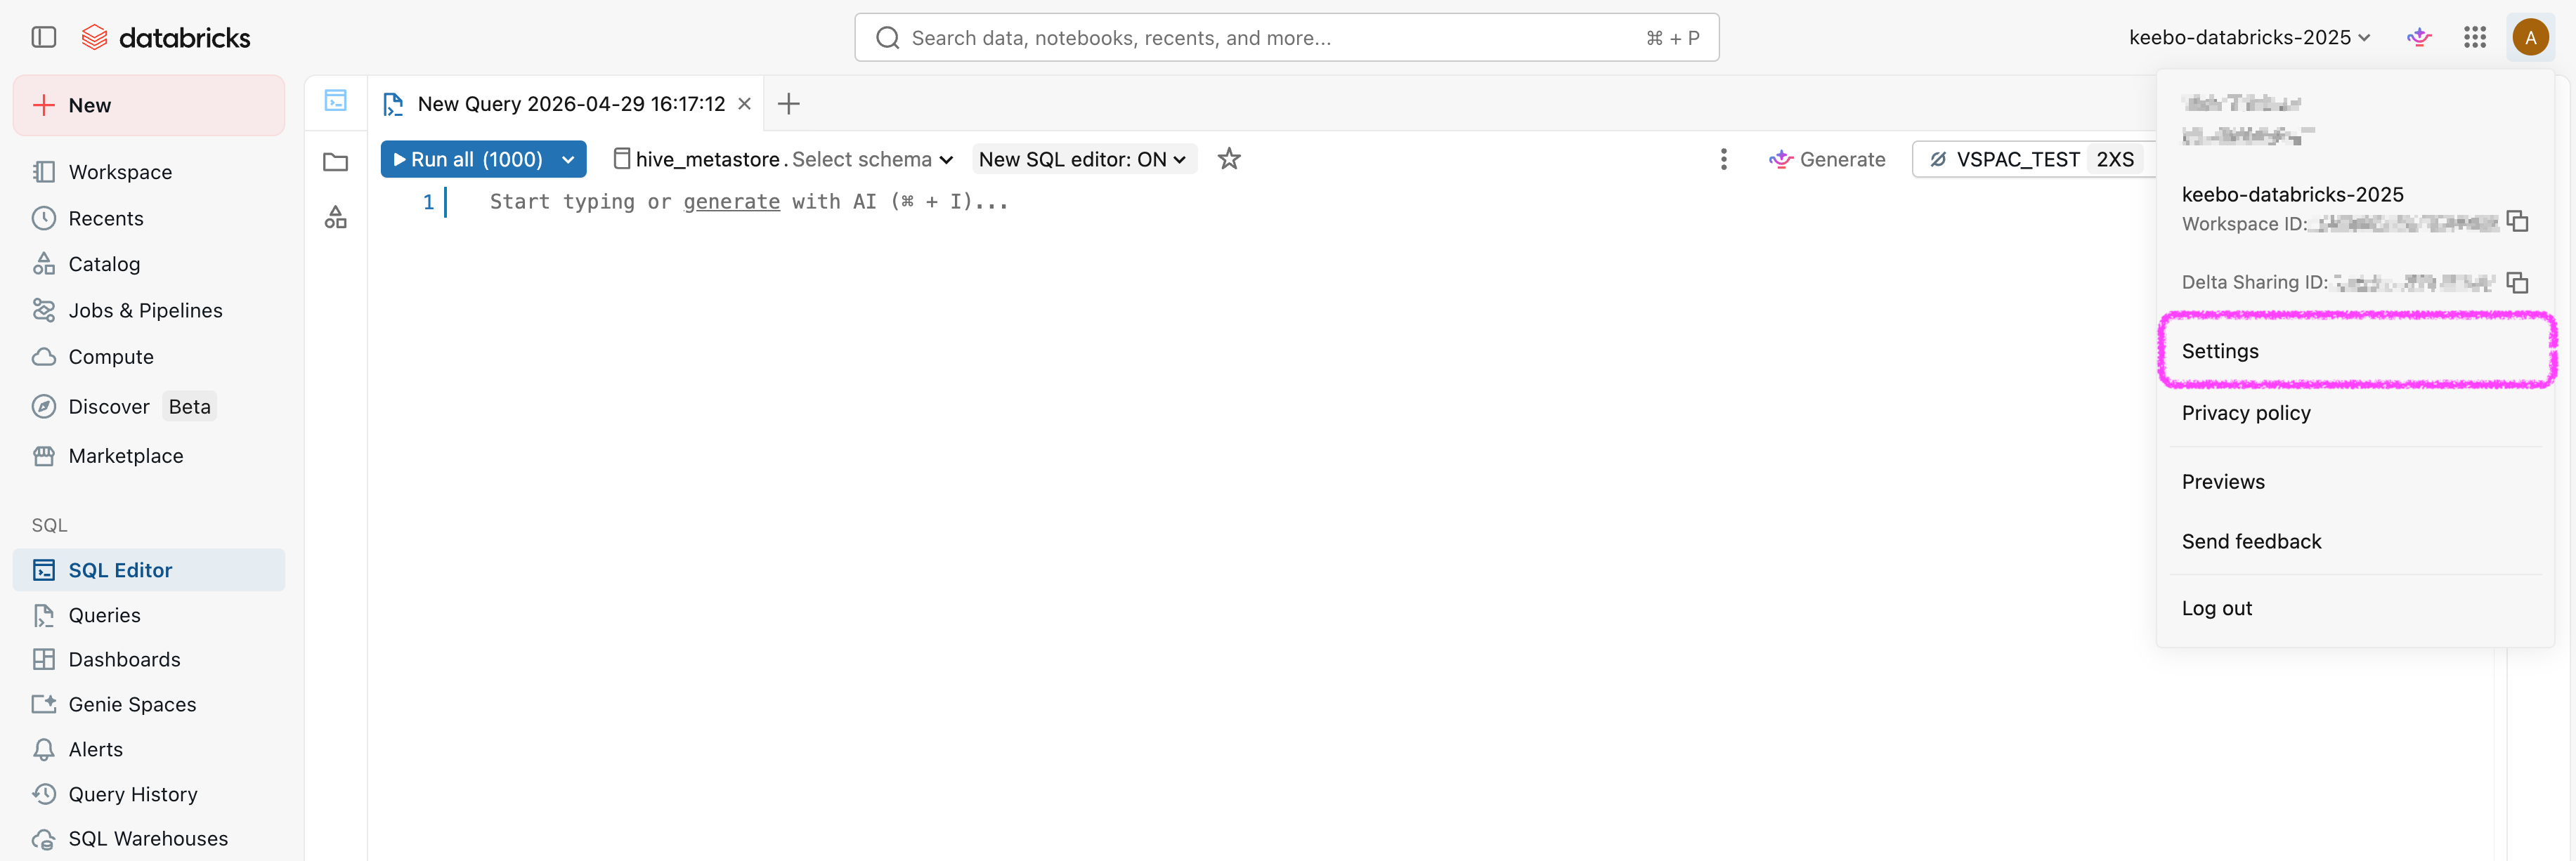
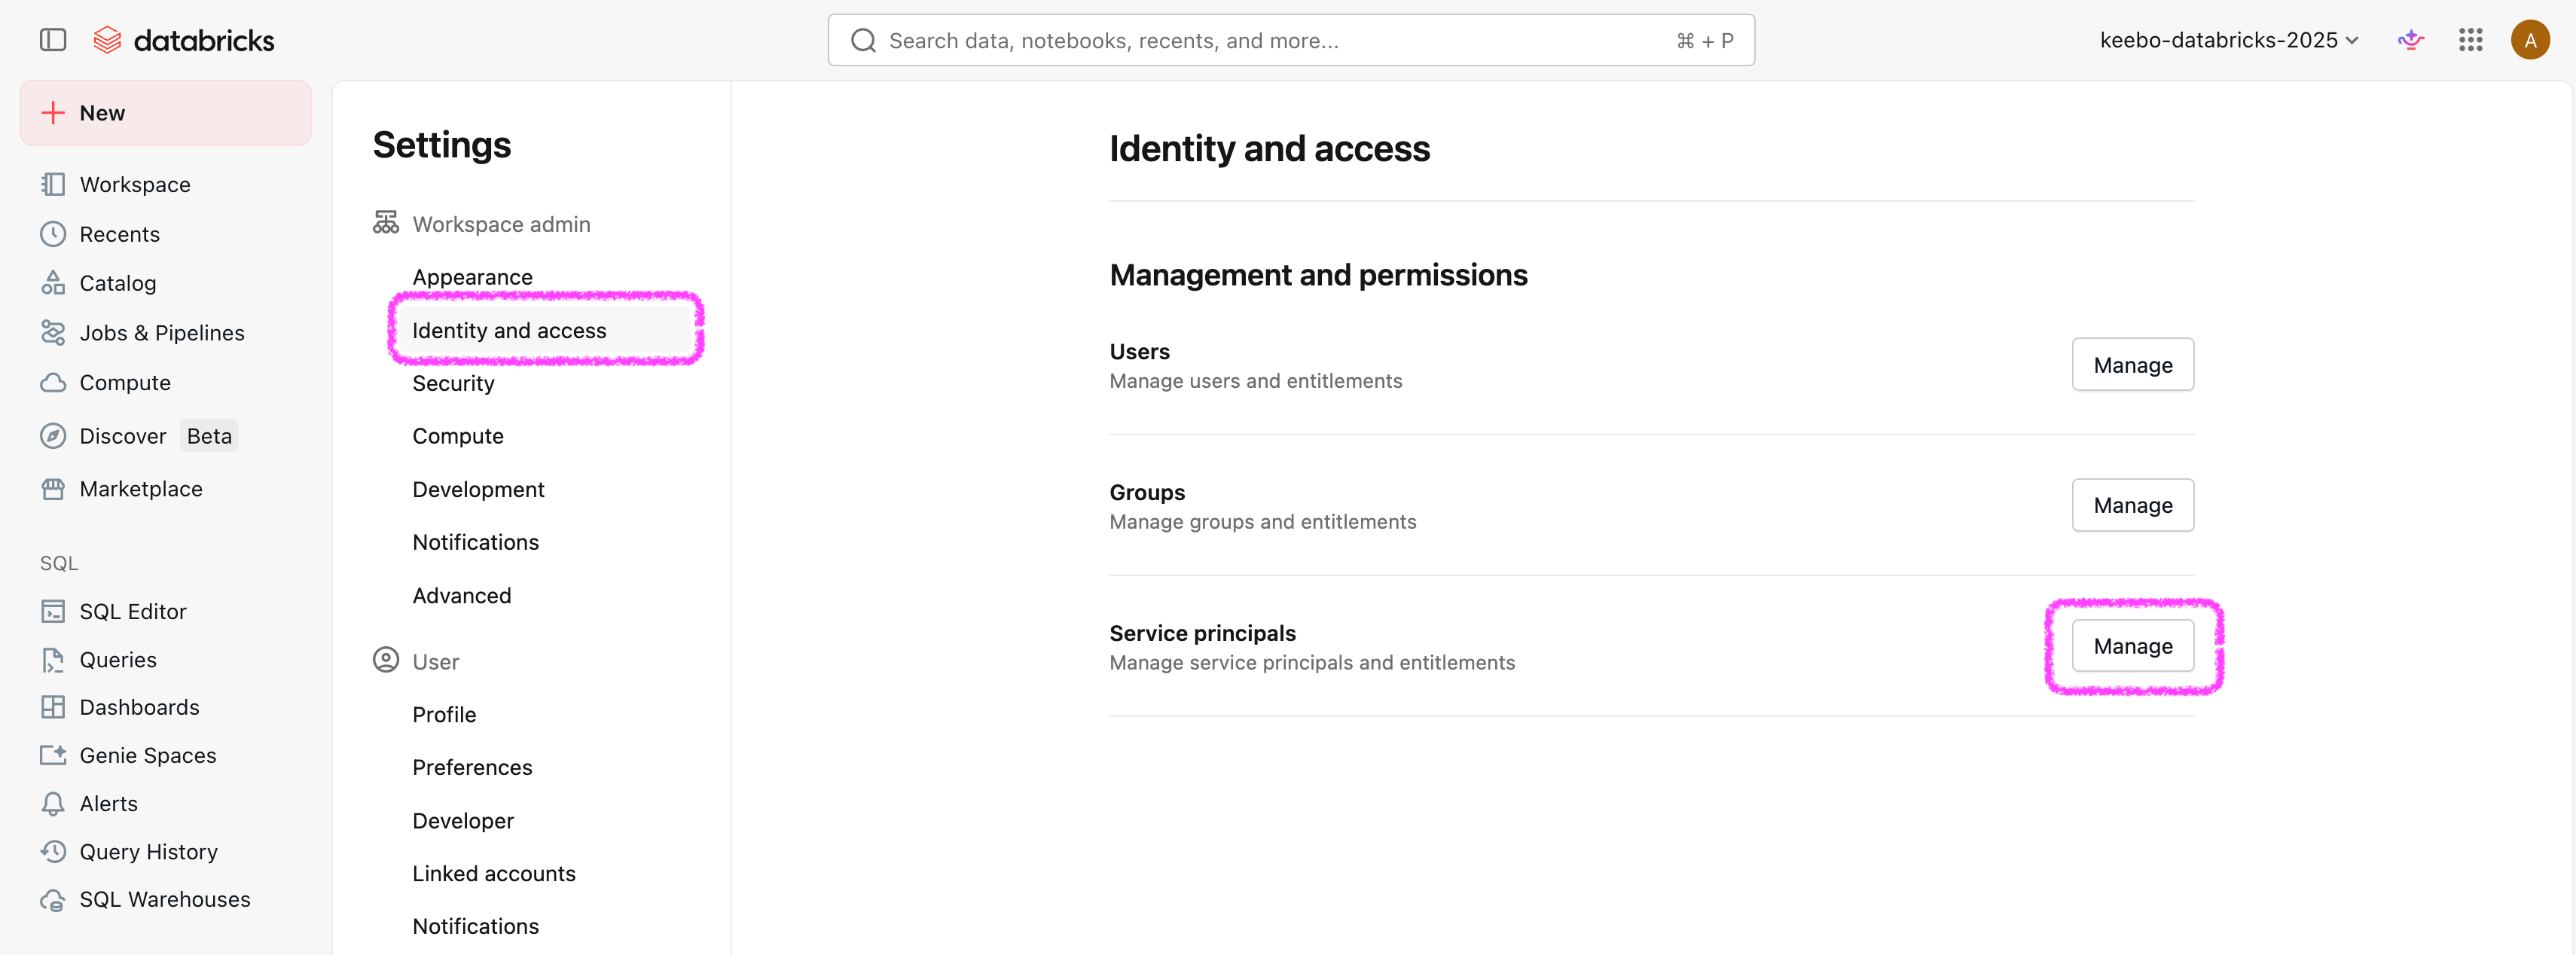
Entitlements
User on the workspace and CAN_MANAGE on warehouses are separate from Databricks entitlements (Workspace access, Databricks SQL access, and others). Depending on group defaults and workspace configuration, the Keebo service principal may need those entitlements explicitly granted for API access. In the workspace: user menu Settings → Identity and access → Service principals → select the principal; entitlements are listed there.
 If a control is greyed out, it is inherited from a group (commonly the workspace users group). Change entitlements on that group or see Databricks entitlements.
How Are System Schemas Enabled?
The views that Keebo uses read from the system catalog. The following system schemas must be enabled: billing, compute, and query.
- Find the Metastore ID of the workspace (for example, run
databricks metastores listif using the CLI). - Verify that the system schemas are enabled:
databricks system-schemas list <metastore-id>
The output should show billing, compute, and query with state ENABLE_COMPLETED. If not, enable them:
databricks system-schemas enable <metastore-id> compute
databricks system-schemas enable <metastore-id> billing
databricks system-schemas enable <metastore-id> query
If these commands do not complete successfully, contact Databricks support.
How Is Keebo Granted Access to Usage Data?
Keebo reads usage data through views in a catalog and schema that the organization controls, not by direct access to the system catalog. The Keebo app generates the exact SQL and verifies the setup is correct — this is completed in Phase 2. The SQL script will:
- Create the catalog and schema (if needed)
- Create or replace the four views that read from system tables (warehouse events, warehouses, billable usage, query history)
- Grant the Keebo service principal SELECT on those views only
- If the Keebo service principal previously had direct access to the
systemcatalog, include REVOKE statements to remove that access
The catalog name defaults to keebo. If a different catalog was chosen during Keebo onboarding, record that name in the Values Reference table instead.
How Is the Export Volume Created?
Batch workload export stores files in a Unity Catalog managed volume at <catalog>.<schema>.export. The default catalog and schema are keebo and kwo, so the default volume path is keebo.kwo.export. The four usage views and the export volume always share the same catalog and schema; only the base volume name export is fixed. If the volume is not present, Keebo cannot export customer data.
Existing catalogs — A new catalog named keebo is recommended when no naming conflict exists, but it is not required. The Keebo-managed schema (usage views plus the export volume) may be created under any existing Unity Catalog catalog the organization already operates, as long as Databricks privileges allow creating the schema, volume, and views there. During the Keebo onboarding wizard, on Validate Schema & Views, enter the Catalog name (and Schema name, if not the default kwo) that should hold those objects, click Save location, then run the SQL Keebo generates in Databricks. Keebo verifies and uses exactly that catalog and schema path going forward.
Step 1 — Create the keebo catalog
keebo as your views catalog?If you configured keebo as the catalog for your usage views, the catalog already exists — use the full SQL below starting from CREATE SCHEMA (or run the whole script idempotently).
How you create the catalog depends on your account's Unity Catalog storage configuration:
- Accounts with a metastore-level managed storage location — run
CREATE CATALOG IF NOT EXISTS keebo;in the SQL Editor. - Accounts using Default Storage (newer auto-enabled workspaces) —
CREATE CATALOGwithout a storage path may be rejected in the SQL editor. Either:- Use the Databricks UI: Go to Data > Catalogs > Create catalog and name it
keebo. The UI handles storage assignment automatically. - Specify a managed location in SQL:
The storage URI depends on your cloud (e.g.
CREATE CATALOG keebo
MANAGED LOCATION '<your-cloud-storage-uri>';s3://bucket/pathon AWS,abfss://...on Azure,gs://...on GCP). The location must be within an external location that you have theCREATE MANAGED STORAGEprivilege on.
- Use the Databricks UI: Go to Data > Catalogs > Create catalog and name it
See the Databricks documentation on managed storage locations for details.
If <keebo-service-principal-client-id> and catalog or schema should not be edited manually in SQL, complete the Keebo onboarding wizard in the Keebo portal and copy the script Keebo shows during Validate Schema & Views (after Verify Access). Keebo generates that script for the connected account; it matches the structure documented in Step 1 — Create the `keebo` catalog on this page—the reference block below.
The full reference SQL below shows the default keebo catalog and kwo schema when all accessibility checks pass. It creates the catalog and schema (when not already present), the export managed volume, the four usage views over system tables, and the Unity Catalog grants for the Keebo service principal. Replace <keebo-service-principal-client-id> with the Keebo service principal Client ID (OAuth M2M). If keebo / kwo were changed in the Keebo portal before verification, substitute the chosen catalog and schema names everywhere below.
Organizations that must provision storage explicitly should follow Databricks guidance for CREATE CATALOG with managed location instead of relying on CREATE CATALOG IF NOT EXISTS alone—the hint text in the Keebo-generated SQL explains this case.
When something is still missing, Keebo shows targeted SQL in the portal until checks pass; the block below is the full template when everything succeeds.
-- Full setup SQL (for reference) — default catalog keebo, schema kwo.
-- Replace <keebo-service-principal-client-id> with your Keebo service principal Client ID.
-- If your organization requires a managed location for new catalogs, use CREATE CATALOG with
-- MANAGED LOCATION (see Databricks managed storage for your cloud) instead of the form below.

CREATE CATALOG IF NOT EXISTS keebo;
CREATE SCHEMA IF NOT EXISTS keebo.kwo;

-- Export volume (uses keebo.kwo from above)

CREATE VOLUME IF NOT EXISTS keebo.kwo.export
  COMMENT 'Keebo export volume (managed volume)';

GRANT USE CATALOG ON CATALOG keebo TO `<keebo-service-principal-client-id>`;
GRANT USE SCHEMA ON SCHEMA keebo.kwo TO `<keebo-service-principal-client-id>`;
GRANT READ VOLUME, WRITE VOLUME ON VOLUME keebo.kwo.export TO `<keebo-service-principal-client-id>`;

-- Create views

CREATE OR REPLACE VIEW keebo.kwo.warehouse_events
WITH SCHEMA EVOLUTION
AS SELECT
    account_id,
    workspace_id,
    warehouse_id,
    event_type,
    cluster_count,
    event_time
FROM system.compute.warehouse_events;

CREATE OR REPLACE VIEW keebo.kwo.warehouses
WITH SCHEMA EVOLUTION
AS SELECT
    warehouse_id,
    workspace_id,
    account_id,
    warehouse_name,
    warehouse_type,
    warehouse_channel,
    warehouse_size,
    min_clusters,
    max_clusters,
    auto_stop_minutes,
    tags,
    change_time,
    delete_time
FROM system.compute.warehouses;

CREATE OR REPLACE VIEW keebo.kwo.billing_usage
WITH SCHEMA EVOLUTION
AS SELECT
    account_id,
    workspace_id,
    record_id,
    sku_name,
    cloud,
    usage_start_time,
    usage_end_time,
    usage_date,
    custom_tags,
    usage_unit,
    usage_quantity,
    usage_metadata,
    identity_metadata,
    record_type,
    ingestion_date,
    billing_origin_product,
    product_features,
    usage_type
FROM system.billing.usage;

CREATE OR REPLACE VIEW keebo.kwo.query_history
WITH SCHEMA EVOLUTION
AS SELECT
    account_id,
    workspace_id,
    statement_id,
    SHA2(executed_by, 256) AS executed_by,
    session_id,
    execution_status,
    compute,
    executed_by_user_id,
    SHA2(statement_text, 256) AS statement_text,
    statement_type,
    error_message,
    client_application,
    client_driver,
    total_duration_ms,
    waiting_for_compute_duration_ms,
    waiting_at_capacity_duration_ms,
    execution_duration_ms,
    compilation_duration_ms,
    total_task_duration_ms,
    result_fetch_duration_ms,
    start_time,
    end_time,
    update_time,
    read_partitions,
    pruned_files,
    read_files,
    read_rows,
    produced_rows,
    read_bytes,
    read_io_cache_percent,
    from_result_cache,
    spilled_local_bytes,
    written_bytes,
    shuffle_read_bytes,
    query_source,
    executed_as_user_id,
    SHA2(executed_as, 256) AS executed_as,
    written_rows,
    written_files,
    cache_origin_statement_id,
    query_parameters,
    query_tags
FROM system.query.history;

-- Grant read access to Keebo's service principal

GRANT SELECT ON VIEW keebo.kwo.warehouse_events TO `<keebo-service-principal-client-id>`;
GRANT SELECT ON VIEW keebo.kwo.warehouses TO `<keebo-service-principal-client-id>`;
GRANT SELECT ON VIEW keebo.kwo.billing_usage TO `<keebo-service-principal-client-id>`;
GRANT SELECT ON VIEW keebo.kwo.query_history TO `<keebo-service-principal-client-id>`;
Run this script in the Databricks SQL Editor for the workspace being connected (typically as a Metastore Admin or equivalent).
Step 2 — Create the schema, volume, and grants
When the full reference SQL in Step 1 — Create the keebo catalog is used, the schema keebo.kwo, volume keebo.kwo.export, views, and grants are already created. This step is only needed if the catalog was provisioned through the UI or a standalone CREATE CATALOG statement and the rest of the DDL was not run yet—in that case, execute the Step 1 script starting from CREATE SCHEMA through the final GRANT SELECT statements.
Verify
Run the following in the Databricks SQL Editor (use your chosen catalog and schema if they differ from the defaults):
SHOW VOLUMES IN SCHEMA keebo.kwo;
You should see export in the results. Save the full export volume path (for example keebo.kwo.export) to the Values Reference table.
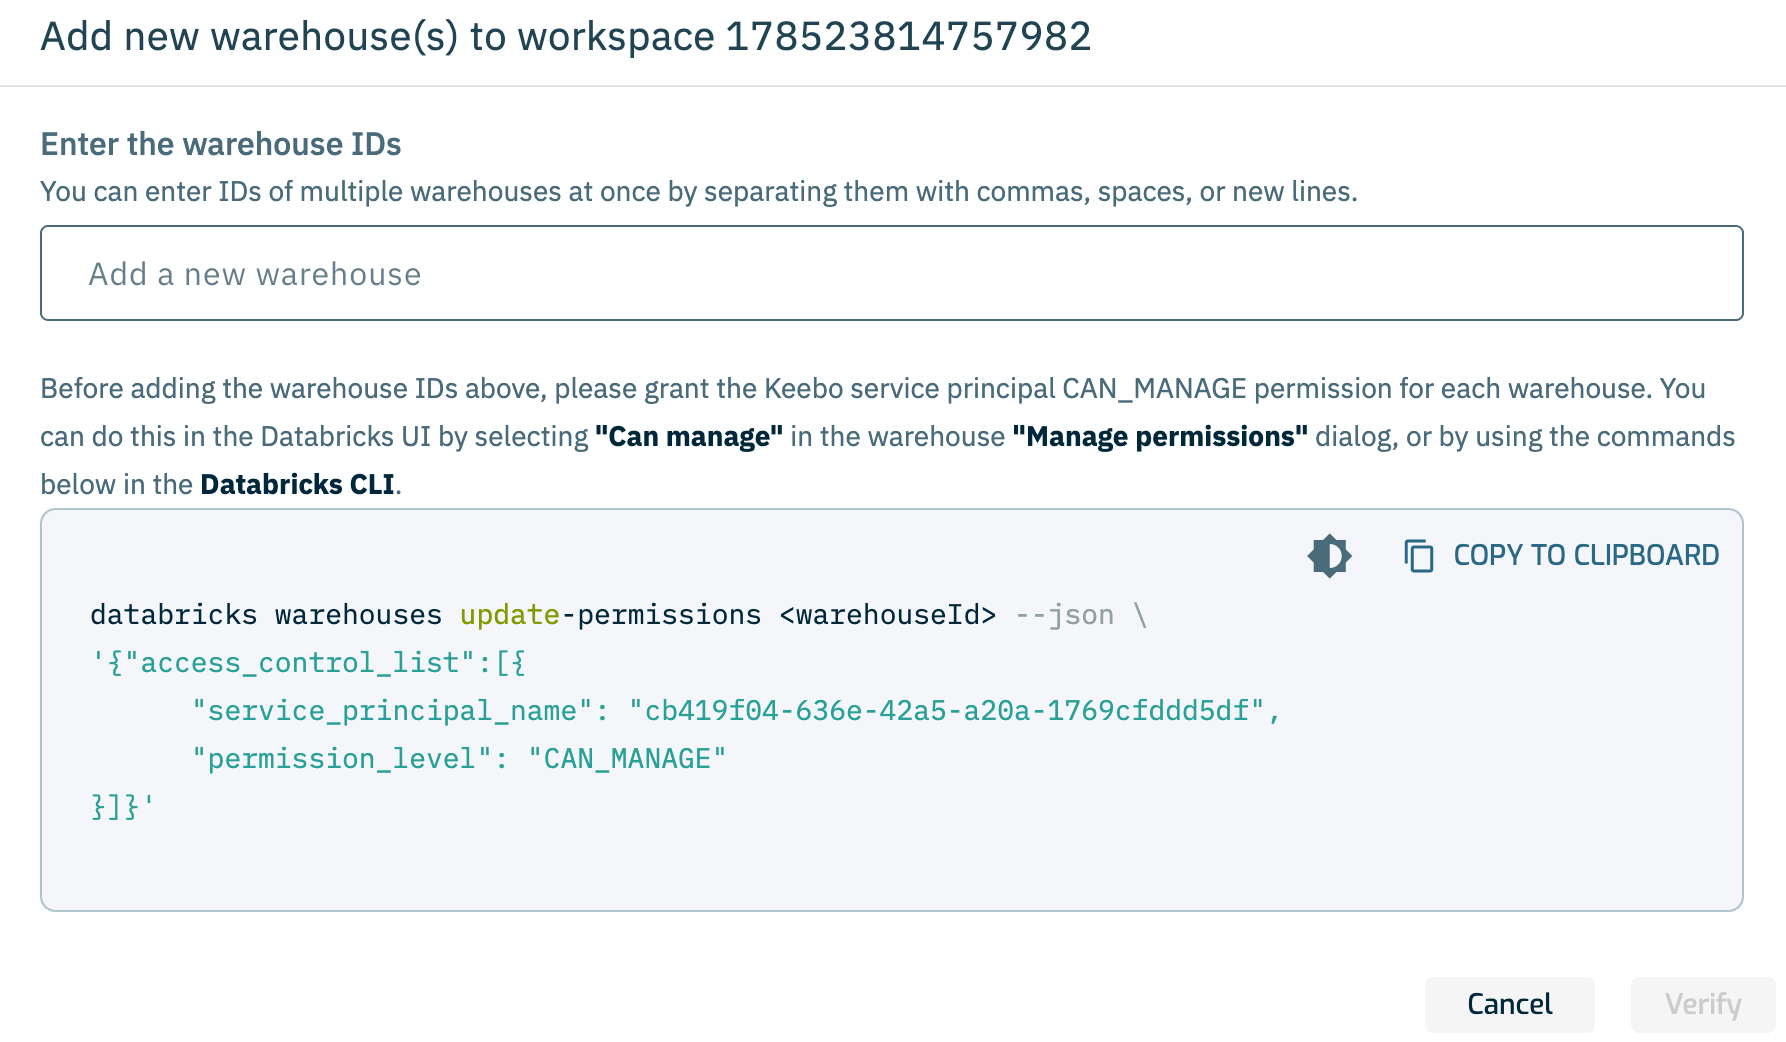
How Are Warehouse Permissions Granted?
For each warehouse to be optimized, the Keebo service principal must be granted CAN_MANAGE permission. This allows Keebo to resize the warehouse and change its configuration. If warehouse APIs fail after this step, also verify entitlements on the service principal.
Add each warehouse ID to the Values Reference table before granting permissions.
Using the Databricks UI
- In the Databricks workspace, open SQL Warehouses from the left navigation.
- Click the three-dot menu next to the warehouse name and open Permissions.
- Search for the Keebo service principal and set its permission to Can Manage.
- Save. Repeat for every warehouse to optimize.
Using the CLI
Replace <clientId> with the service principal Client ID and <warehouseId> with the warehouse ID:
databricks warehouses update-permissions <warehouseId> --json '{
  "access_control_list": [{
    "service_principal_name": "<clientId>",
    "permission_level": "CAN_MANAGE"
  }]
}'
How Is Network Access Configured?
If the Databricks account or workspace has IP access lists enabled, Keebo's egress IPs must be added to the allow list. If IP access lists are not enabled, skip this step.
IP access lists require the Enterprise pricing tier in Databricks.
The Keebo egress IP addresses are listed in Databricks Security Setup.
Option 1: Account Console (UI)
- Log in to the Databricks Account Console and go to Security > Account console IP access list.
- Enable the IP access list feature if it is not already on.
- Click Add rule, select ALLOW, provide a label (e.g. "Keebo"), and enter the Keebo IP addresses.
- Save the rule. Changes may take a few minutes to take effect.
See the Databricks IP access list documentation for details.
Option 2: Workspace IP Access Lists (CLI)
# Enable IP access lists for the workspace (if not already enabled)
databricks workspace-conf set-status --json '{"enableIpAccessLists": "true"}'

# Create an allow list entry for Keebo
databricks ip-access-lists create --json '{
  "label": "Keebo",
  "list_type": "ALLOW",
  "ip_addresses": [
    "34.123.209.159/32",
    "34.134.199.98/32",
    "34.136.192.189/32",
    "34.123.121.251/32",
    "35.226.95.64/32",
    "35.232.243.181/32",
    "34.41.176.165/32",
    "35.224.13.139/32",
    "34.29.108.17/32",
    "34.30.123.135/32"
  ]
}'
Once any IP address is added to an allow list, all IP addresses not on the list are blocked. Ensure your own network is included before enabling this feature to avoid losing access.
See the Databricks workspace IP access list documentation for details.
Phase 2 — Keebo Onboarding Wizard
Once Phase 1 is complete and all values have been collected from the Values Reference table, sign in to the Keebo portal and complete the onboarding wizard. Contact the Keebo customer success team if no one at the organization has accessed the portal before.
The wizard walks through four steps, each with inline validation to confirm that the configured Databricks objects are accessible.
Step 1 — Service Principal
Enter the credentials collected during Phase 1:
- Account ID — from the Databricks Account Console URL
- Service principal name — the name given to the Keebo service principal (e.g. "Keebo")
- Client ID — from the service principal detail page
- Client Secret — generated during service principal setup
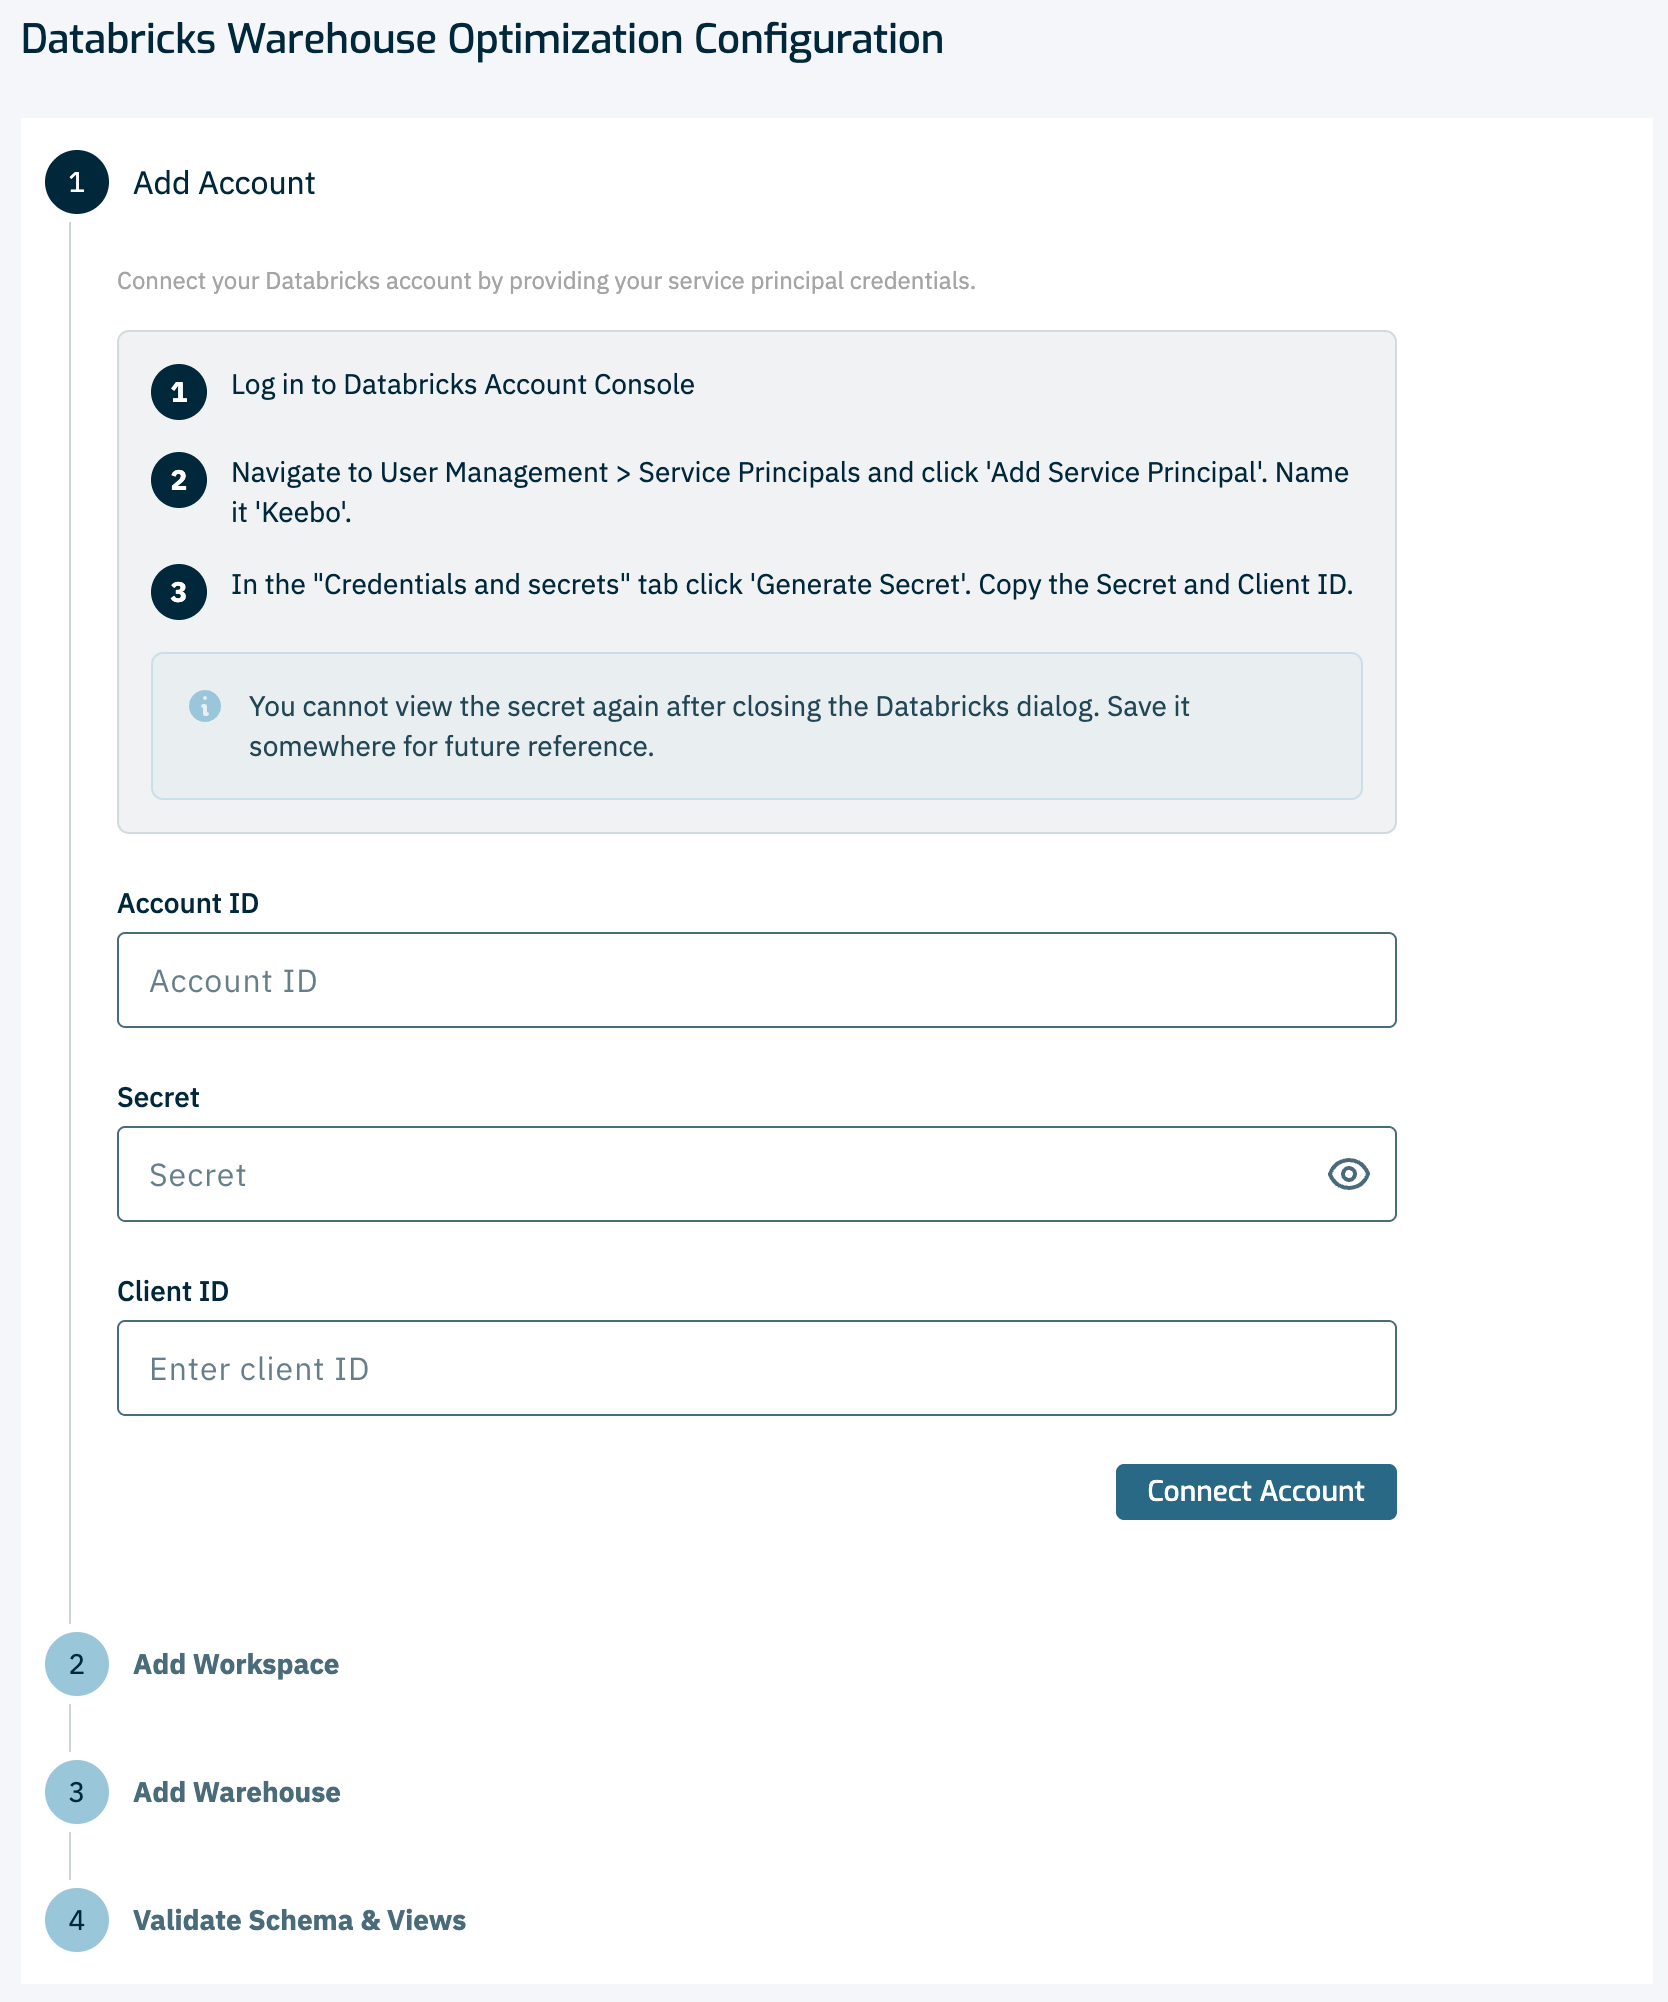
The wizard validates the credentials against the Databricks Account Console before proceeding.
Step 2 — Workspaces
Enter the workspace URL for each workspace to connect. The workspace URL is the address bar URL when logged into the Databricks workspace (e.g. https://xyz.cloud.databricks.com).
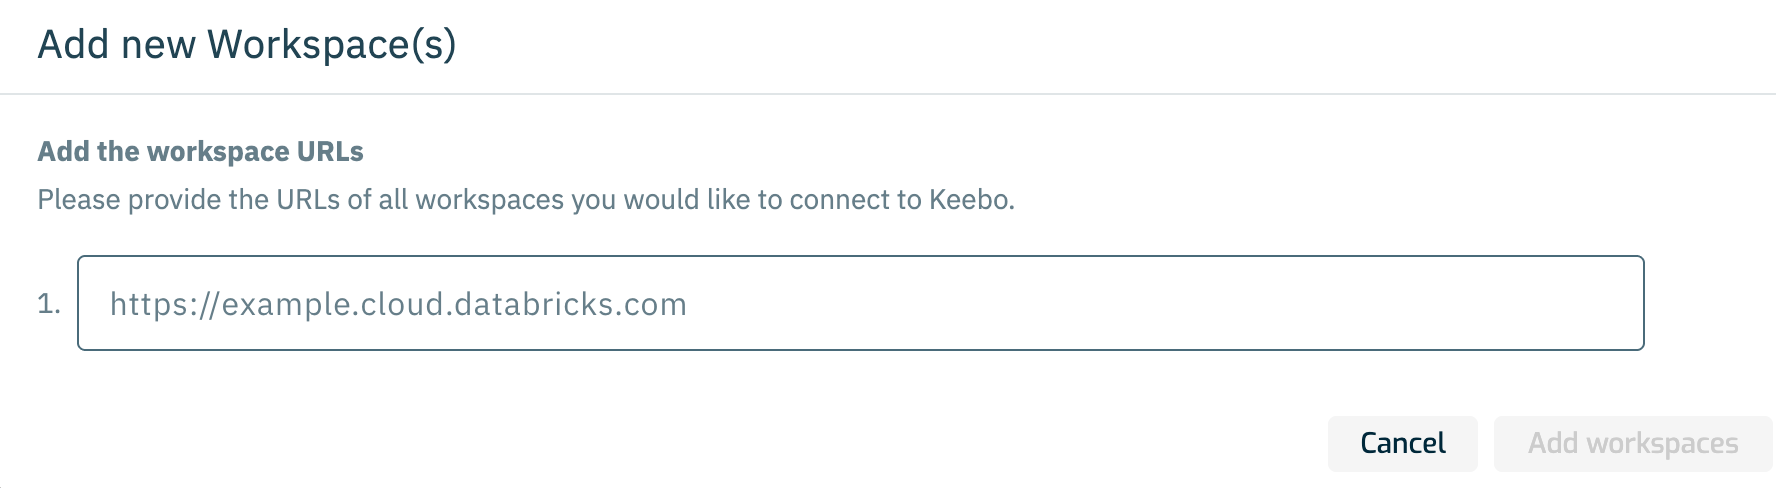
Multiple workspaces can be added. The wizard validates that the service principal has User access on each workspace entered.
Step 3 — Warehouses
Enter the warehouse ID for each SQL warehouse to optimize. The warehouse ID is displayed next to the warehouse name in SQL Warehouses in the Databricks left navigation.
The wizard validates that the service principal has CAN_MANAGE on each warehouse entered.
Step 4 — Schema Configuration
Validate Schema & Views is the last step of the Keebo onboarding wizard. Keebo checks that the Unity Catalog catalog and schema, the four usage views, and the export volume <catalog>.<schema>.export exist and are accessible to the Keebo service principal. The defaults are catalog keebo, schema kwo, and volume path keebo.kwo.export.
The step shows Catalog and Schema fields and Save location. Enter the catalog and schema where those objects should live (including an existing catalog if applicable), click Save location, then copy the generated SQL into the Databricks SQL Editor for the workspace being connected. If anything is missing or not accessible, Keebo shows additional SQL to address only what failed; when all checks pass, it shows the full reference script. Click Verify Access until every check passes.
For the documented default reference (when all checks pass), see Step 1 — Create the `keebo` catalog. To avoid hand-editing that reference, use the SQL Keebo generates in this wizard step instead.
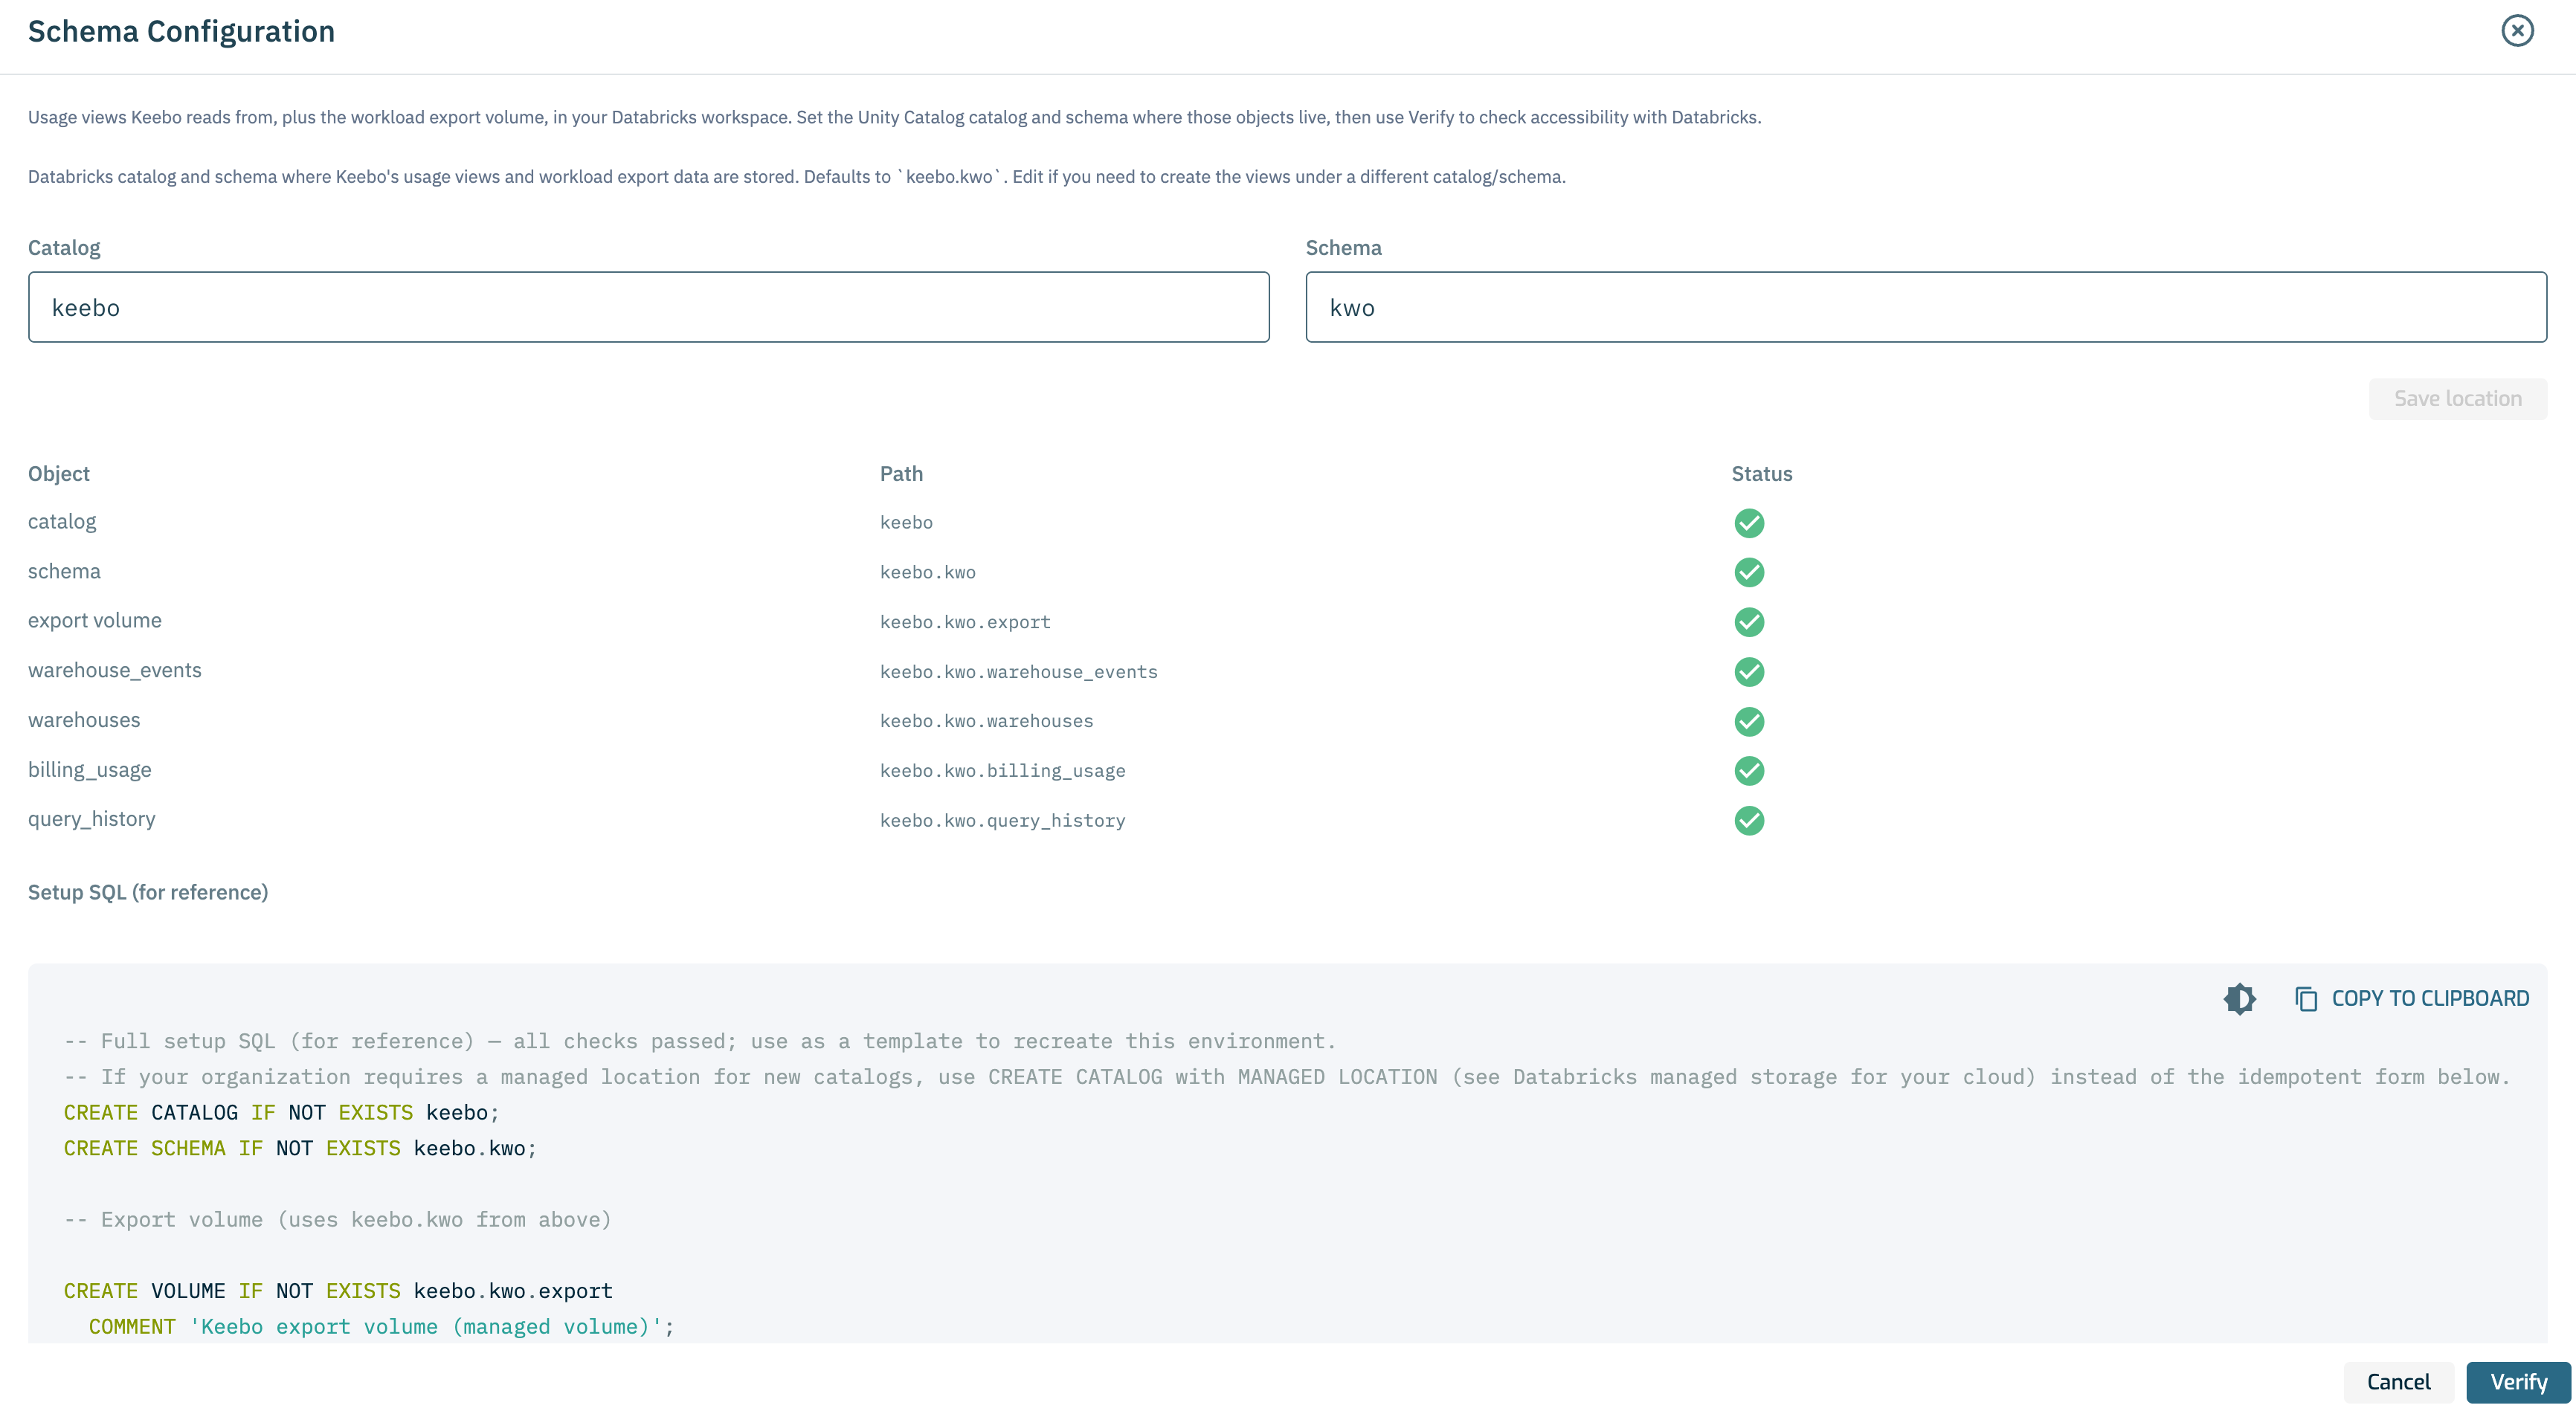
Once all checks pass — catalog, schema, all four views, and the export volume — the workspace is fully connected and Warehouse Optimization begins optimizing the selected warehouses.