Setup Guide
Warehouse Optimization for Databricks is currently in preview. Reach out to Keebo support for access and onboarding.
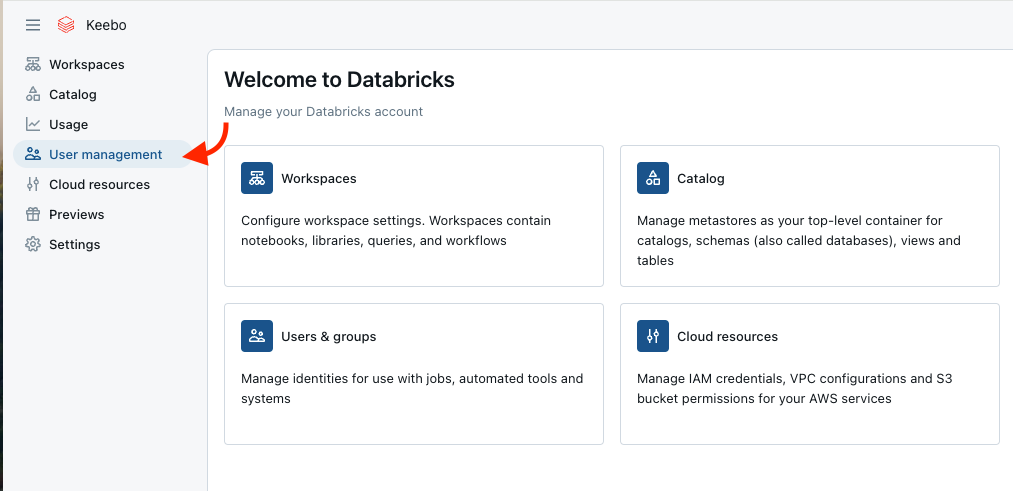
What Does Keebo Access in a Databricks Environment?
Keebo Warehouse Optimization constantly adapts and responds to changing conditions within a Databricks environment in real time, applying optimizations as needed. All real-time functionality is enabled via the Databricks REST API, which retrieves real-time usage data and updates warehouses according to calculated optimizations. The following endpoints are used:
- Get warehouse info — retrieves metadata about an optimized warehouse, such as its size
- List queries — retrieves recent query history as input to optimization algorithms
- Update warehouse — makes configuration changes to apply calculated optimizations
Keebo also periodically processes batches of billable usage events to calculate cost savings from applied optimizations. This is done by querying views in the Databricks account that are created during setup. Those views read from the following Databricks system tables:
- Warehouse events table — warehouse state changes
- Warehouses table — warehouse configuration changes, such as size changes
- Billable usage — used to compute savings generated by optimizations
- Query history — input for optimization models
Keebo only has SELECT on these views — direct access to the system catalog is not required and should not be granted. The Keebo app provides the exact SQL to create these views and grant access.
Every piece of data retrieved from a Databricks environment serves a specific role in the optimization process. No data is used or persisted beyond what is necessary for that purpose.
What Are the Prerequisites?
Before starting the setup process, ensure the following prerequisites are in place:
- Unity Catalog enabled — The workspace being onboarded must have Unity Catalog enabled. Follow the official Databricks documentation if Unity Catalog is not yet enabled.
- Account Admin and Metastore Admin permissions — The user completing the setup must be an Account Admin for the Databricks account and a Metastore Admin on the workspaces being connected.
- Databricks CLI (optional) — The CLI is only needed to enable system schemas or manage warehouse permissions via the command line. Most setup can be done in the Keebo app and by running the provided SQL script in the Databricks SQL Editor. If using the CLI, refer to Installing the CLI and Authenticating with OAuth M2M.
How Is a Service Principal Created in Databricks?
Keebo uses OAuth M2M authentication to integrate Databricks workspaces. Follow these steps to set up an OAuth2 service principal for Keebo in the Databricks Account Console.
Note: These instructions assume a single Keebo service principal is used to authenticate with all Databricks workspaces. Contact Keebo support for assistance with multiple service principals per account.
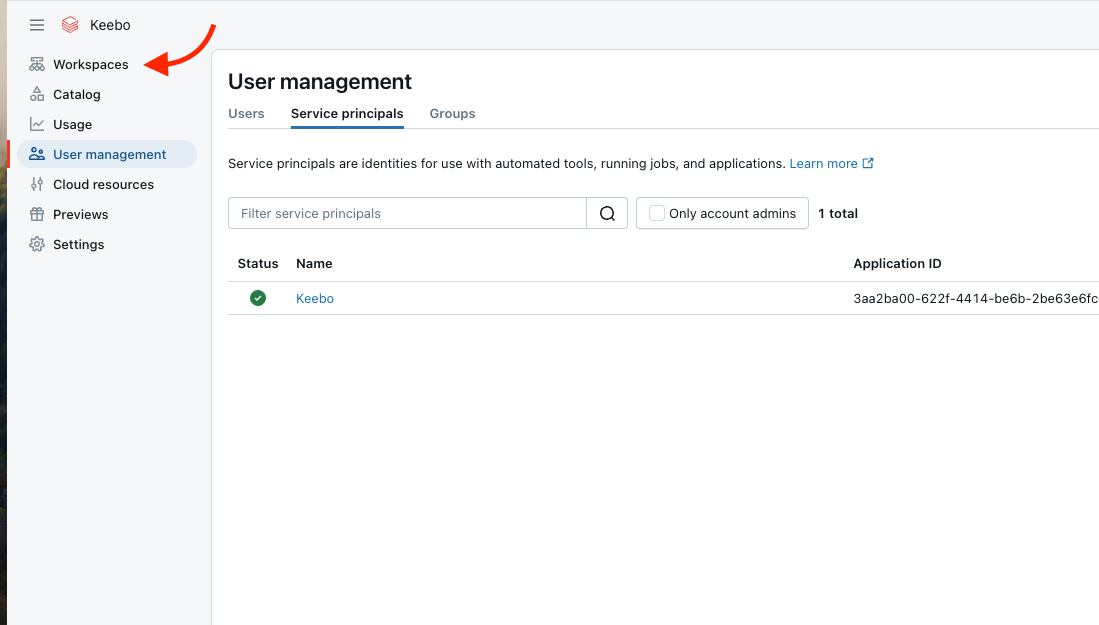
- Log in to the Databricks Account Console:
- In the left navigation, select User Management.
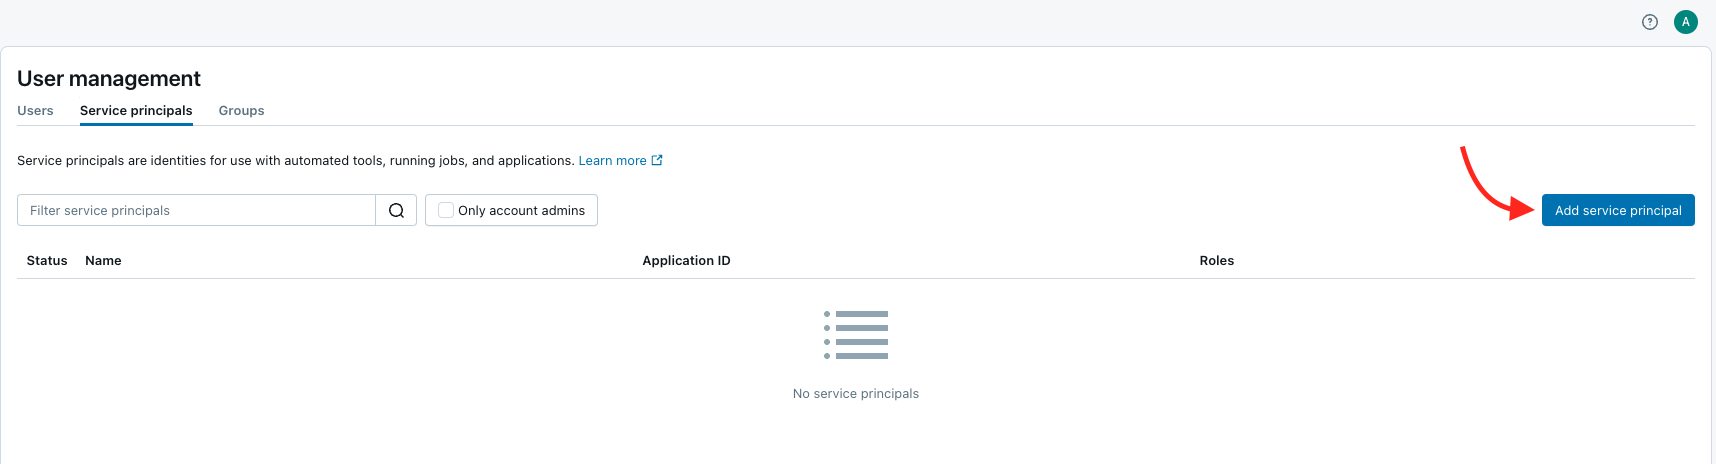
- Open the Service Principals tab and click Add service principal.
- (Azure only) Select "Databricks managed" under the "Management" section.
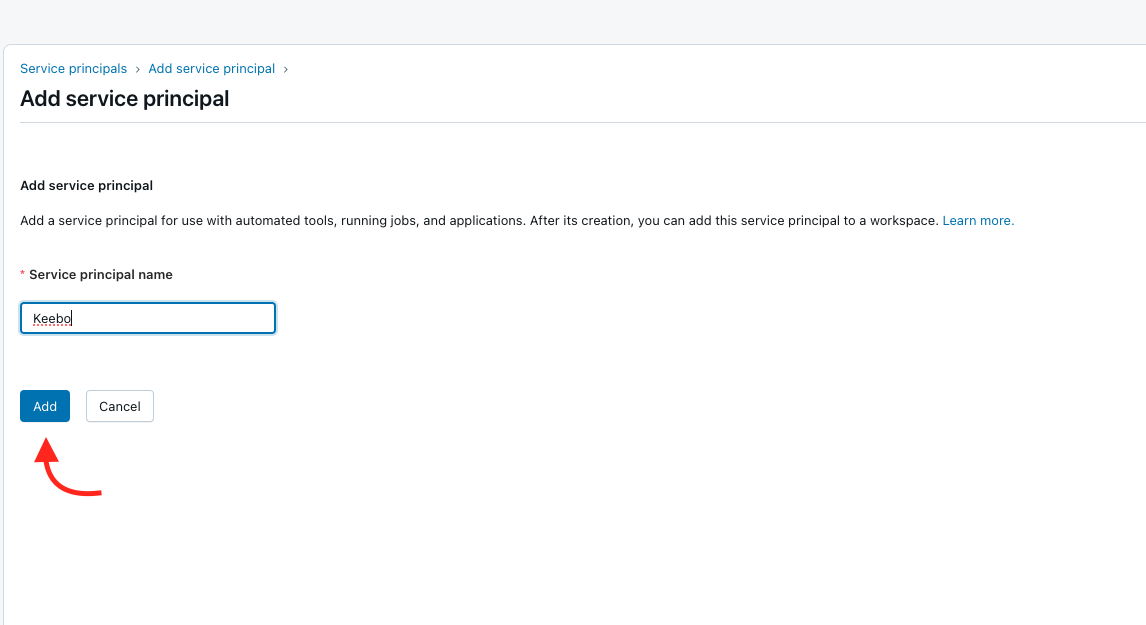
- Enter a name for the service principal (recommended: "Keebo") and click Add.
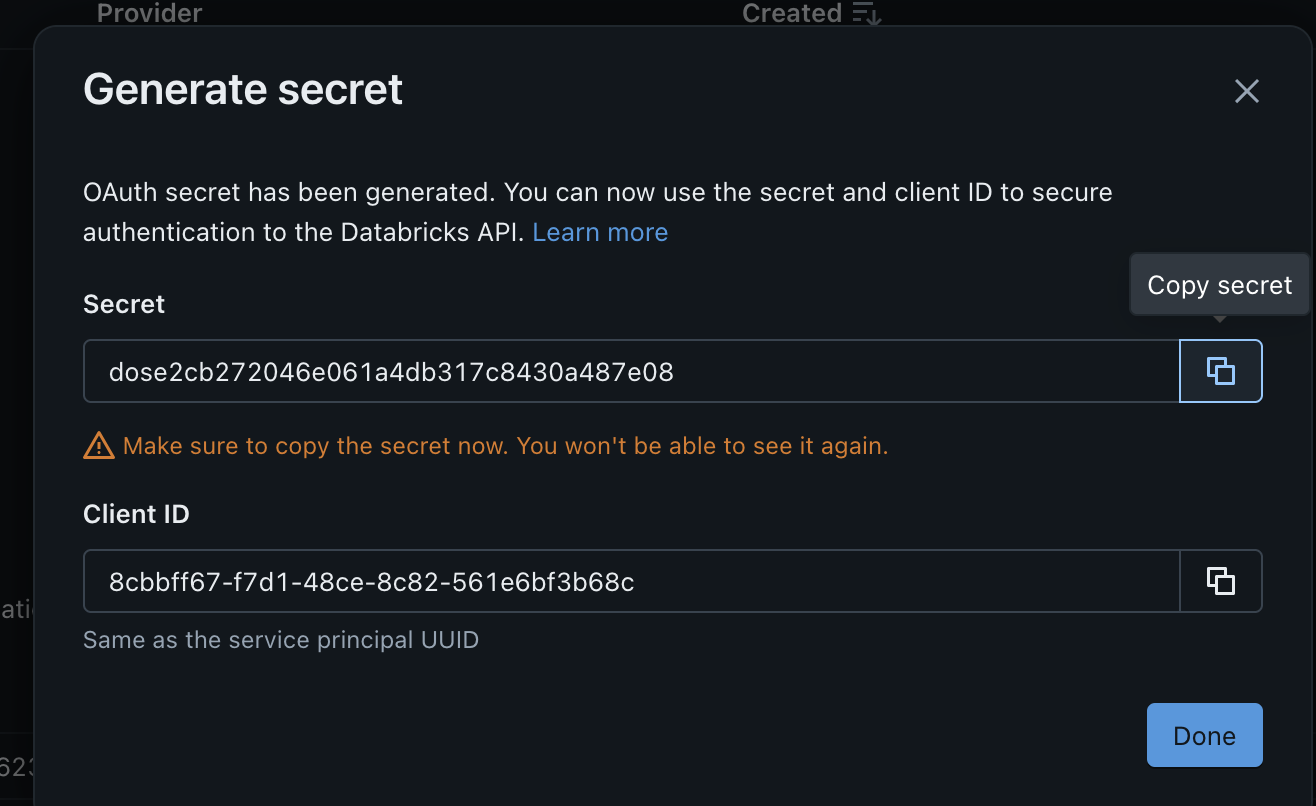
- Select the newly created service principal and click Generate Secret.
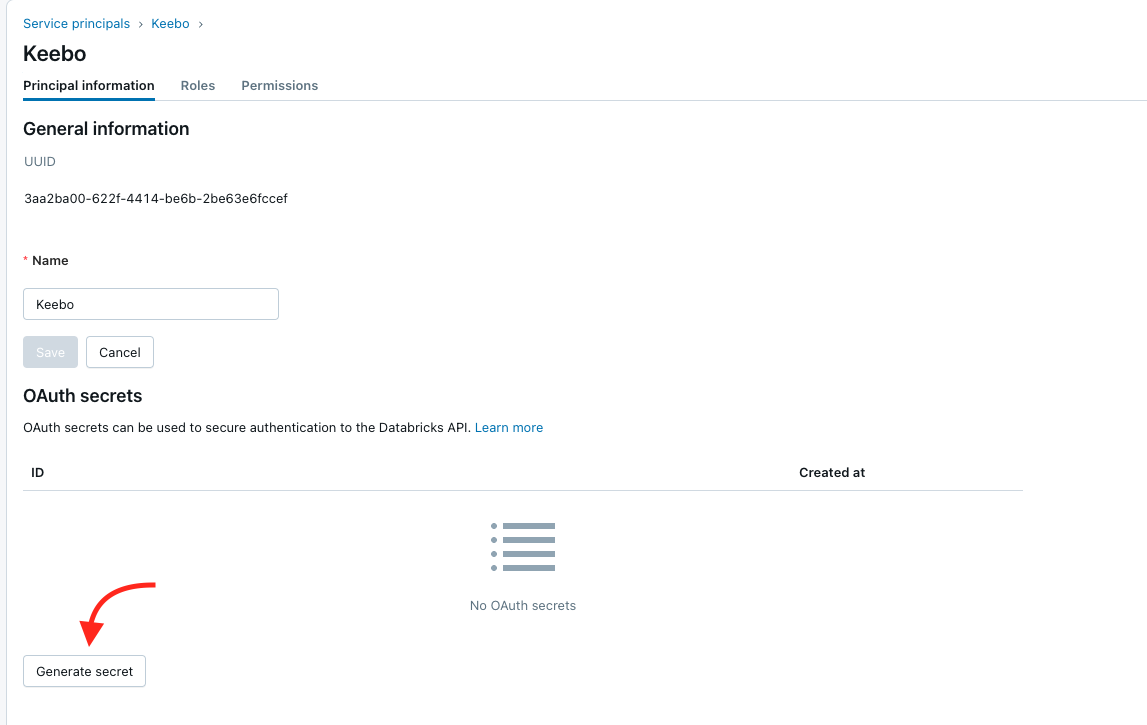
- Copy the Client ID and Secret from the pop-up and store them securely. The Secret cannot be viewed again after this step. These credentials are entered in the Keebo app when adding the account (see How Is the Account Connected in the Keebo App? below).
How Are Workspace Permissions Assigned to the Service Principal?
The service principal needs access to every workspace being connected with Keebo. Repeat these steps for each workspace.
- In the Account Console, click Workspaces in the sidebar.
- Click the name of the workspace to connect.
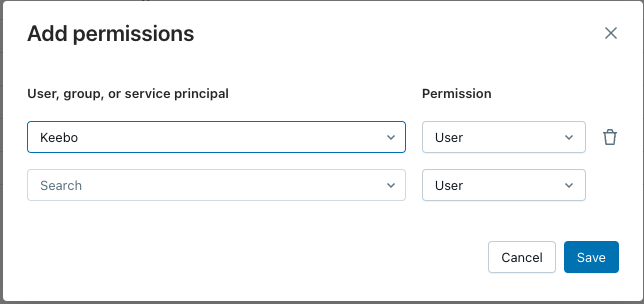
- Open the Permissions tab and click Add permissions.

- Search for and select the Keebo service principal, set the permission level to User, and click Save.
Do not run GRANT ... ON CATALOG system for the Keebo service principal. Keebo uses a views-based approach instead (see the next section).
How Is Keebo Granted Access to Usage Data?
Keebo reads usage data through views in a catalog and schema that the organization controls, not by direct access to the system catalog. The Keebo app generates the exact SQL and verifies that the setup is correct.
Configuring the Schema and Running the SQL Script
-
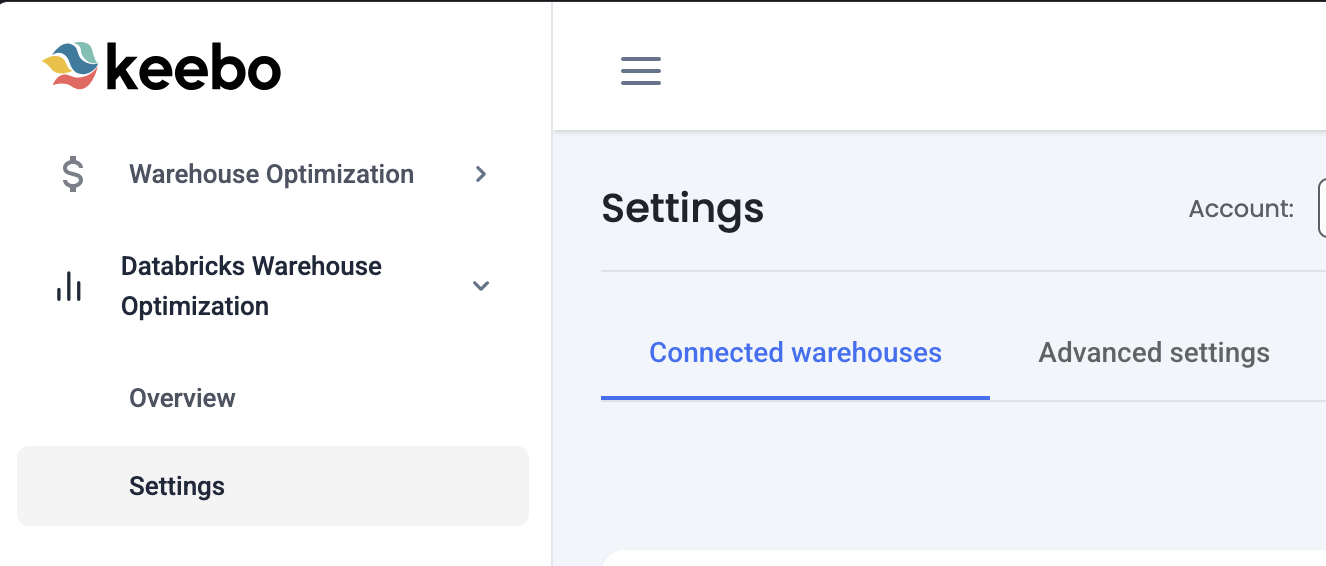
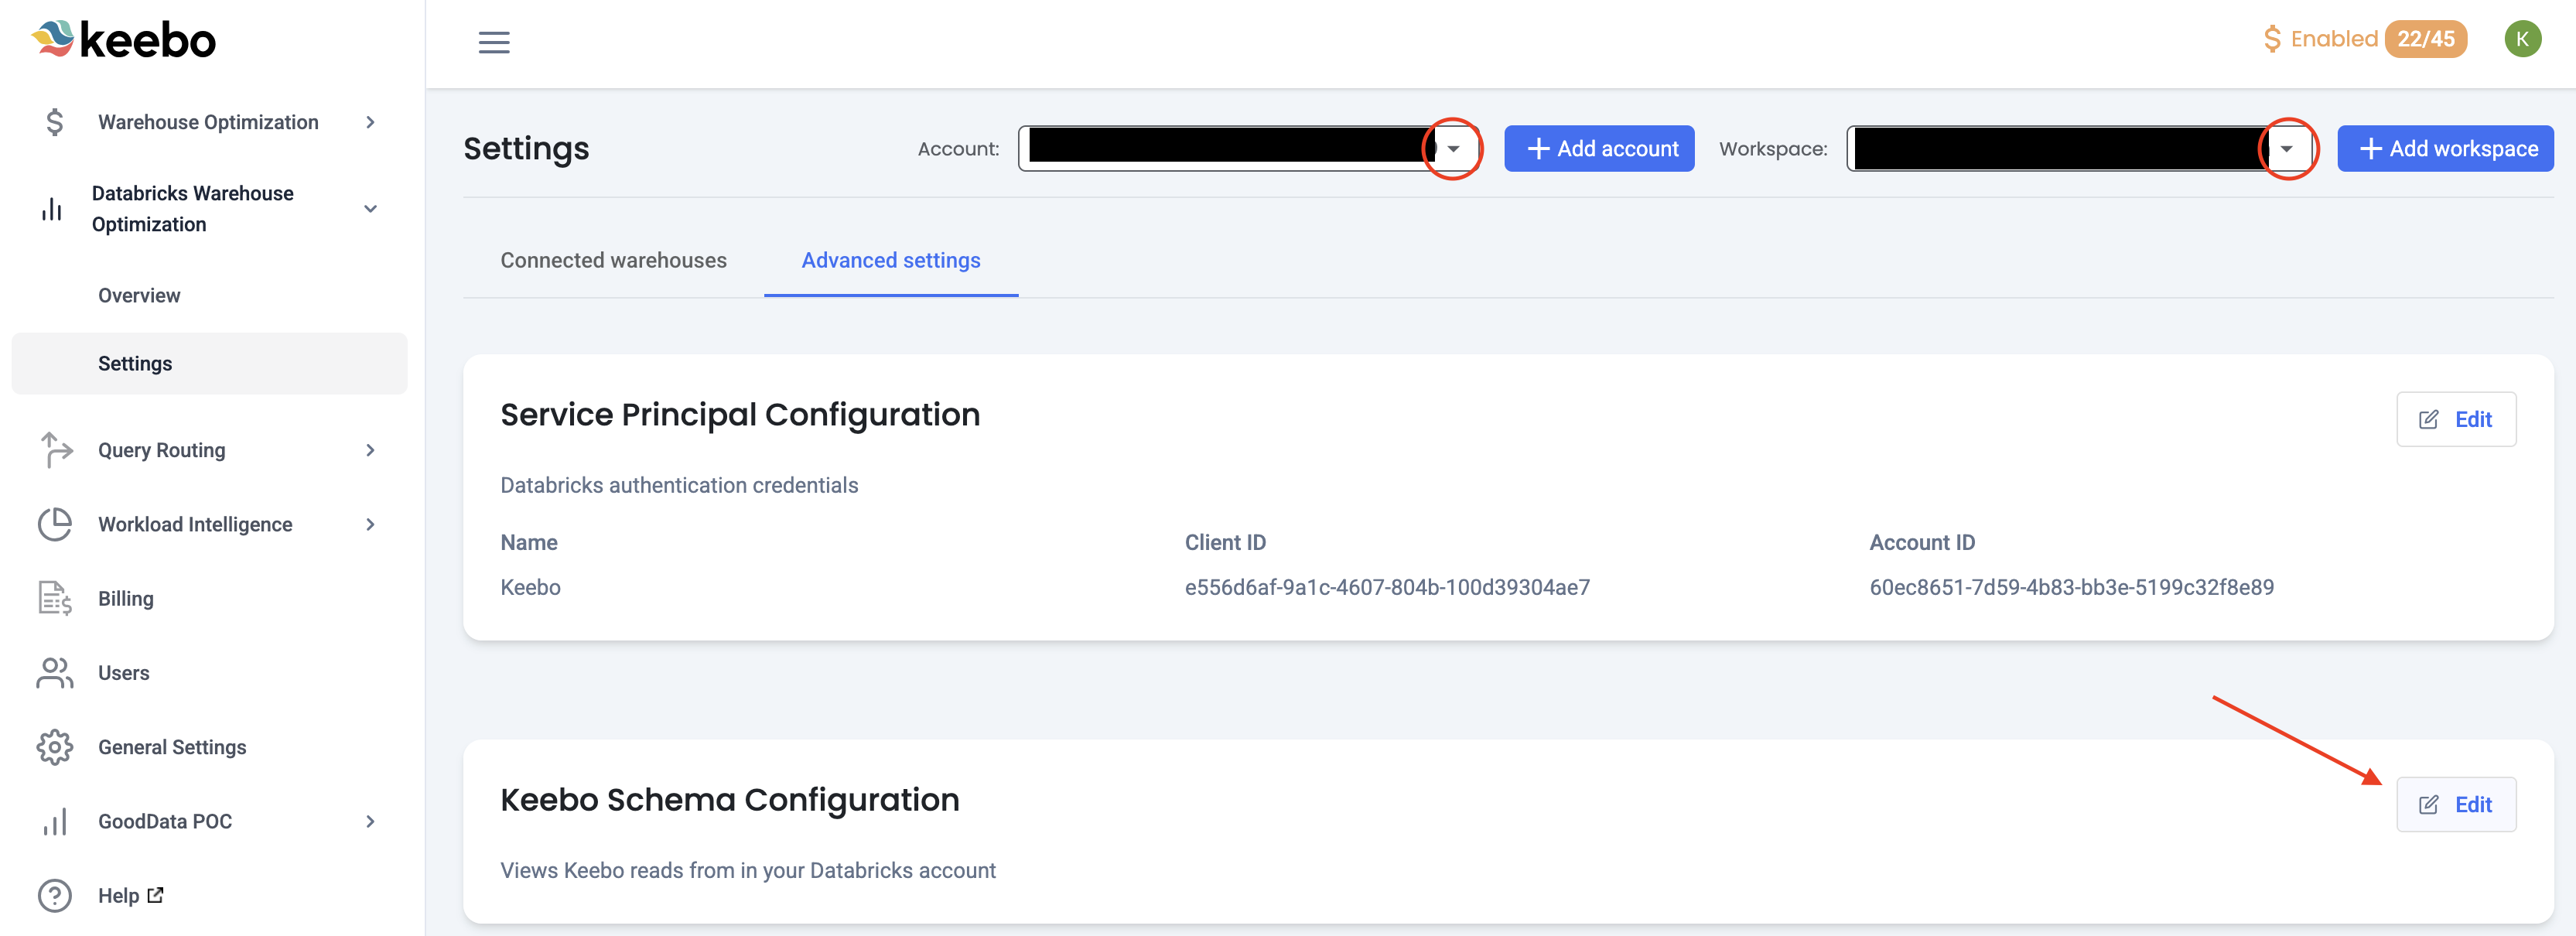
In the Keebo app, go to Settings and open the Advanced tab (Databricks Advanced Settings).
-
Select the account and workspace in the dropdowns, then open Schema configuration.
-
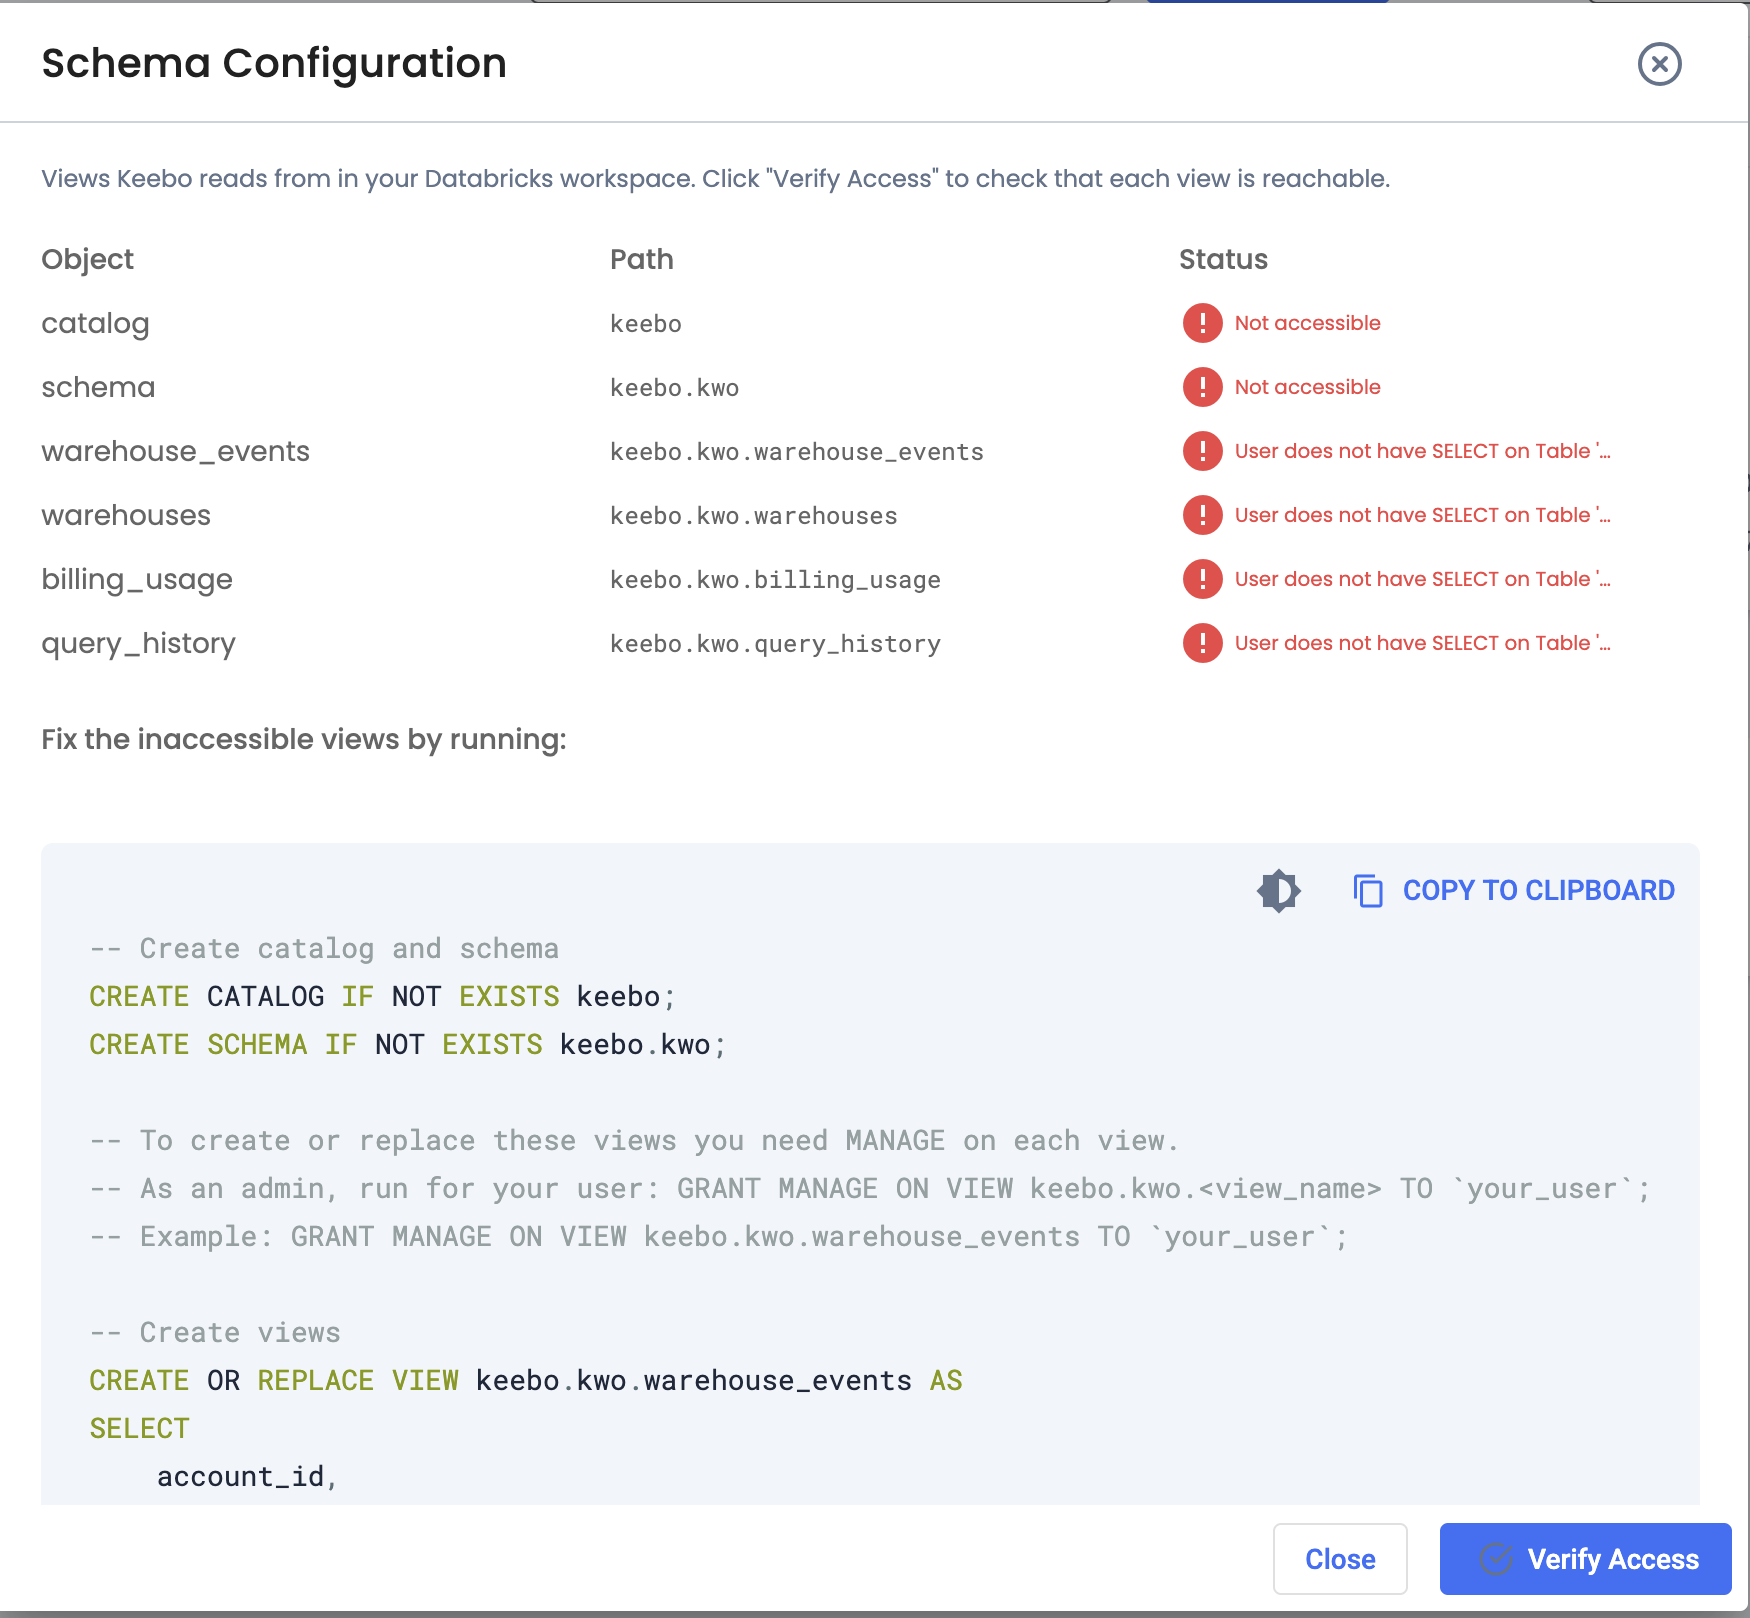
Click Verify Access.
-
The app checks whether the required catalog, schema, and four views exist and are accessible to the Keebo service principal. If anything is missing or not accessible, the app displays the exact SQL to run in the Databricks SQL Editor. That script will:
- Create the catalog and schema (if needed)
- Create or replace the four views that read from the system tables (warehouse events, warehouses, billable usage, query history)
- Grant the Keebo service principal SELECT on those views only
- If the Keebo service principal previously had direct access to the
systemcatalog, the script includes REVOKE statements to remove that access (least privilege)
-
Copy the script from the Keebo app and run it in the Databricks SQL Editor in the workspace being connected.
If errors about MANAGE on the views appear, the script includes a comment with an example: grant MANAGE on each view first, then re-run the script.
-
In the Keebo app, click Verify Access again until all checks pass (catalog, schema, and all four views accessible with the correct columns).
How Are System Schemas Enabled?
The views that Keebo uses read from the system catalog. The following system schemas must be enabled so that those views can query the system tables: billing, compute, and query.
- Find the Metastore ID of the workspace (for example, run
databricks metastores listif using the CLI). - Verify that the system schemas are enabled:
databricks system-schemas list <metastore-id>
The output should show billing, compute, and query with state ENABLE_COMPLETED. If not, enable them:
databricks system-schemas enable <metastore-id> compute
databricks system-schemas enable <metastore-id> billing
databricks system-schemas enable <metastore-id> query
If these commands do not complete successfully, contact Databricks support.
How Is the Account Connected in the Keebo App?
Once the service principal has been created in Databricks and workspace permissions (User role) have been assigned, connect it in the Keebo app. Go to Settings (Warehouse Optimization → Settings) and open the Advanced tab.
Adding an Account
- Click Add account.
- Enter the Account ID (from the Databricks account URL, after
account_id=), Service principal name (e.g. "Keebo"), Client ID, and Client secret from the Databricks Account Console.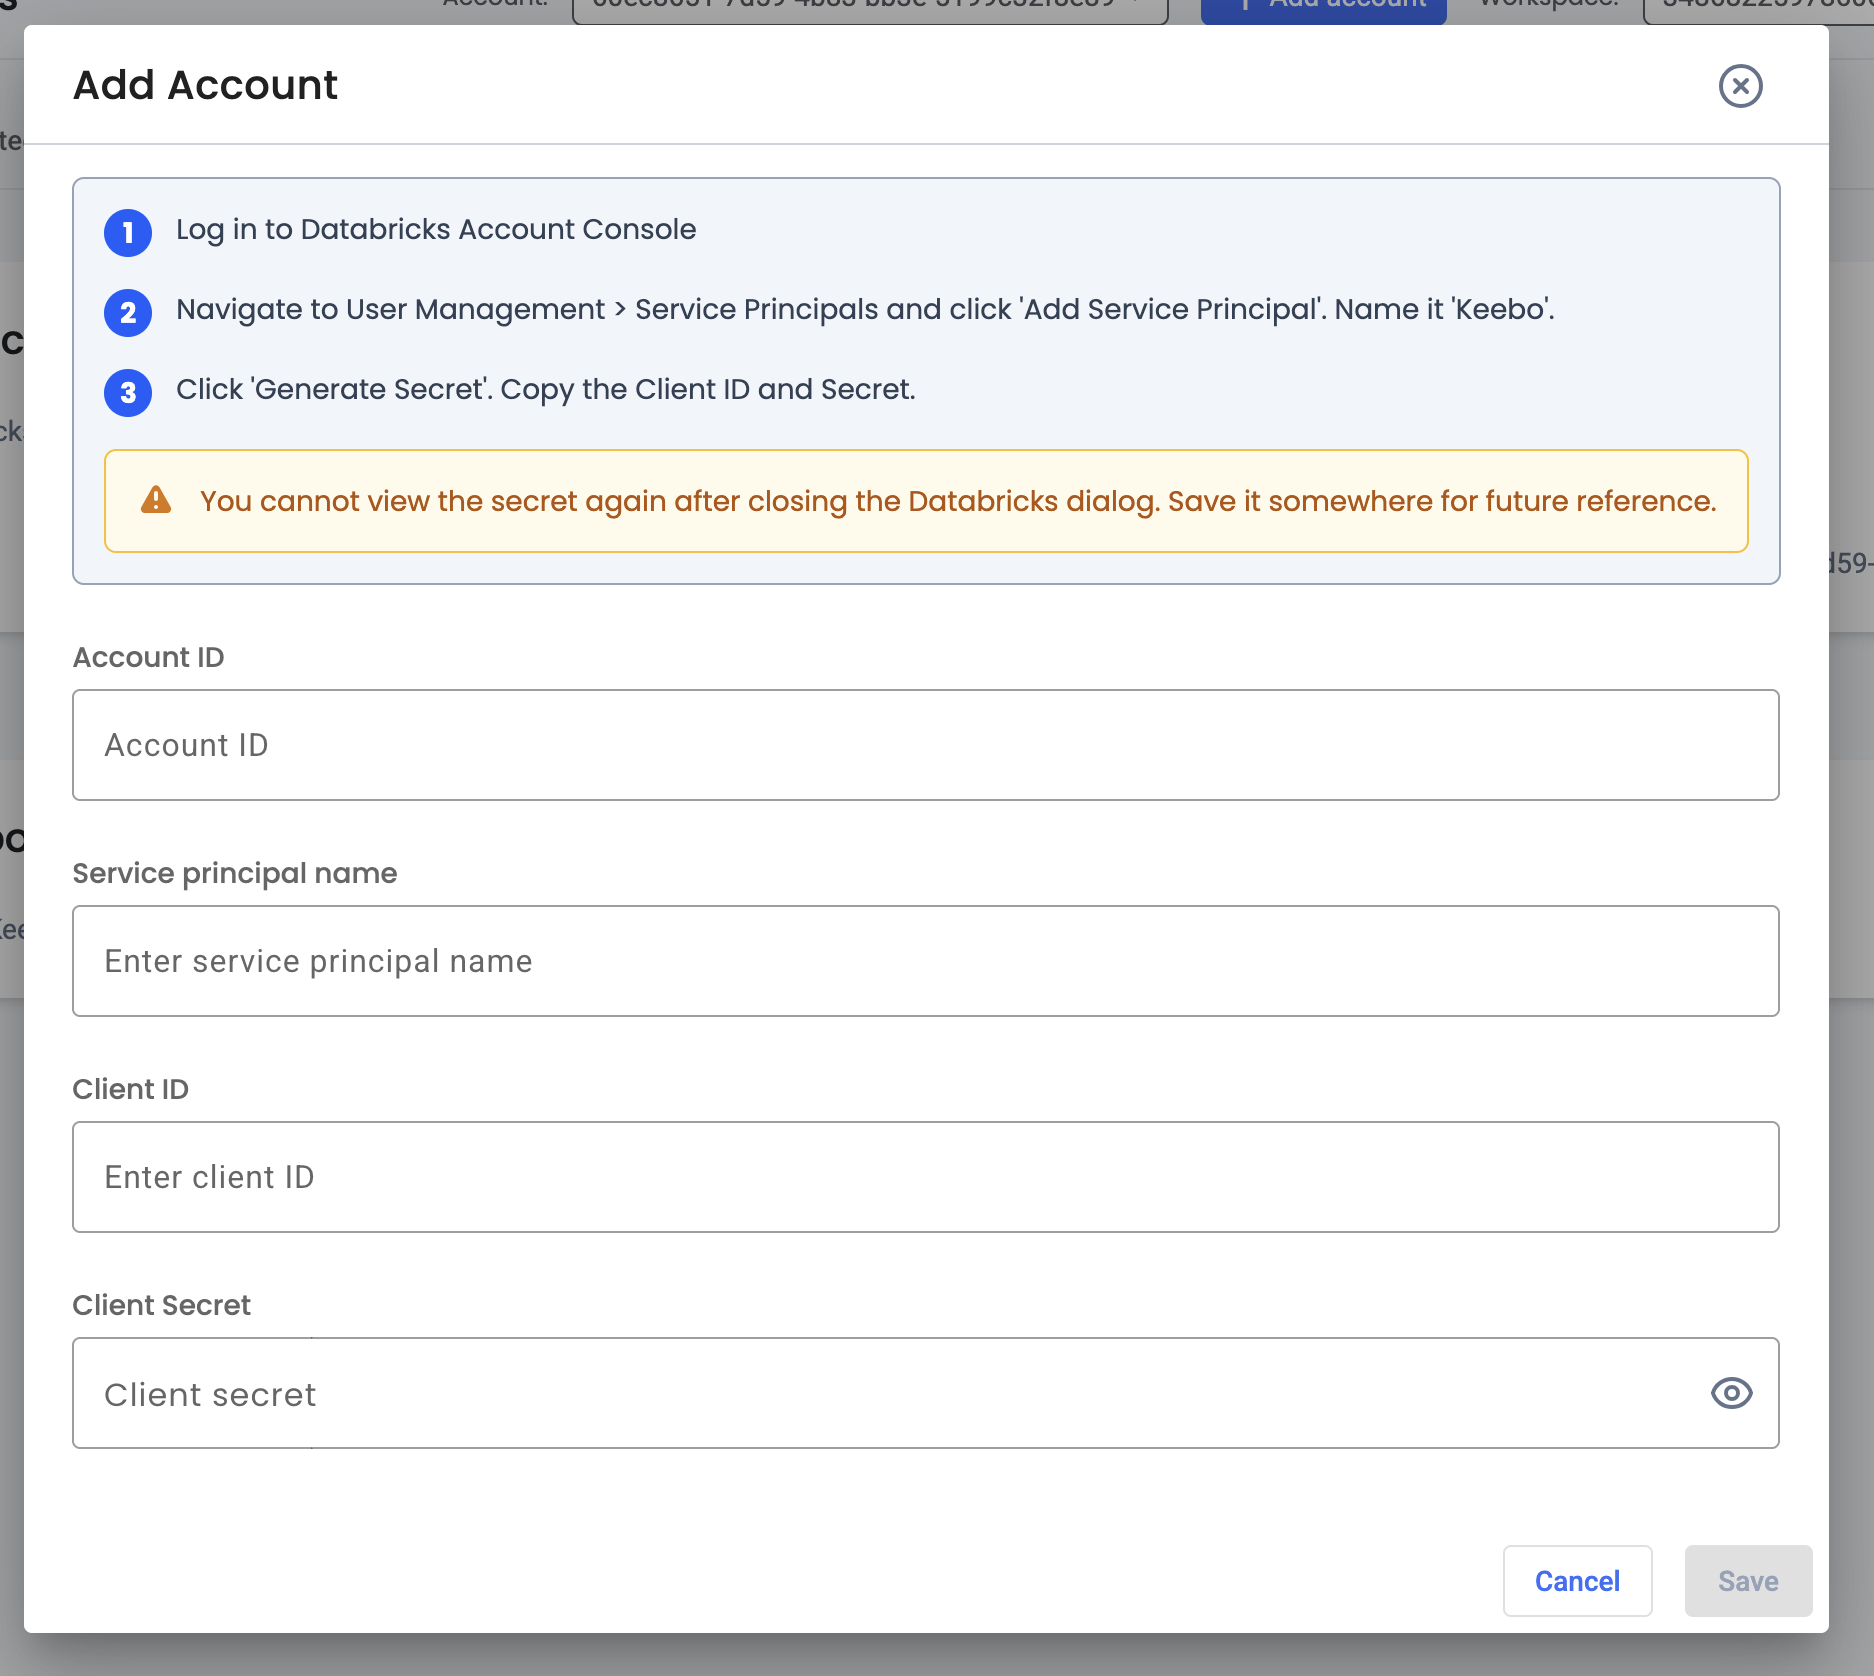
- Click Save. The app validates the credentials and the account appears in the Account dropdown.
Adding Workspaces
- Select the account in the Account dropdown.
- Click Add workspace. Enter the workspace URL for each workspace to connect (the URL in the address bar when logged into the Databricks workspace, e.g.
https://xyz.cloud.databricks.com). Multiple URLs can be added.
- Click Save. Repeat for every workspace to optimize with Keebo.
How Is a Warehouse Connected for Optimization?
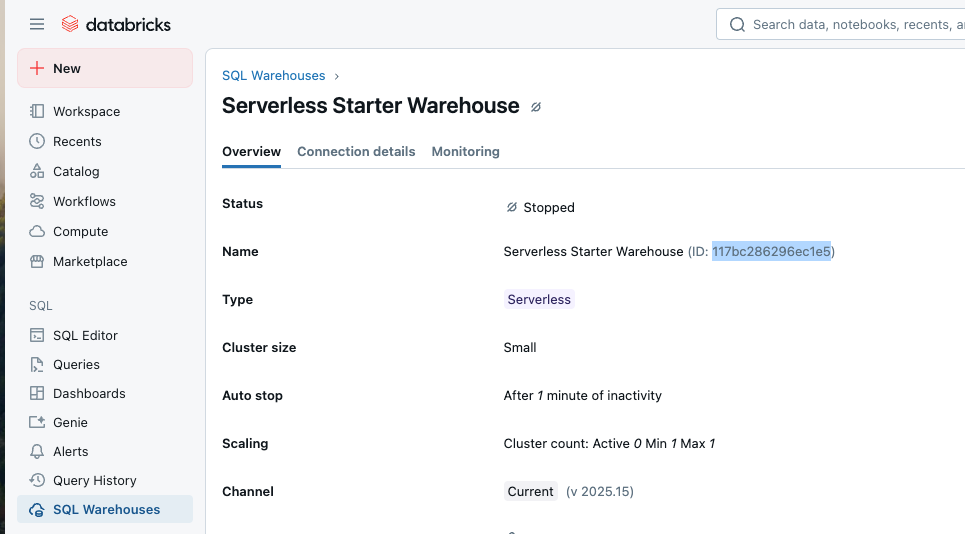
With an account and workspace connected, warehouses can be added. The warehouse ID is found next to the warehouse name in SQL Warehouses in the Databricks left navigation.
- In the Databricks settings view, select the Account and Workspace in the dropdowns.
- Click Add warehouse, enter the warehouse ID, and save. Repeat for every warehouse to optimize.
How Are Warehouse Management Permissions Granted?
For each warehouse to be optimized, the Keebo service principal must be granted CAN_MANAGE permission in Databricks. This allows Keebo to resize the warehouse and change its configuration based on optimization recommendations. This can be done before or after adding the warehouse in the Keebo app.
Using the Databricks UI
- In the Databricks workspace that contains the warehouse, open SQL Warehouses from the left navigation.
- Click the three-dot menu next to the warehouse name and open Permissions.
- Search for the Keebo service principal and set its permission to Can Manage.
- Save. Repeat for every warehouse to optimize.
Using the CLI
Replace <clientId> with the service principal Client ID and <warehouseId> with the warehouse ID:
databricks warehouses update-permissions <warehouseId> --json '{
  "access_control_list": [{
    "service_principal_name": "<clientId>",
    "permission_level": "CAN_MANAGE"
  }]
}'
What Is the Recommended Order of Steps?
- In Databricks: Create the Keebo service principal (Account Console). Assign it User on each workspace. Enable system schemas billing, compute, and query.
- In the Keebo app: Go to Settings → Advanced. Click Add account and enter Account ID, service principal name, Client ID, and Client secret. Click Add workspace and enter each workspace URL. Open Schema configuration, click Verify Access, and run the provided SQL in the Databricks SQL Editor until all checks pass. Click Add warehouse and enter each warehouse ID.
- In Databricks: Grant the Keebo service principal CAN_MANAGE on each warehouse added in the app.